
A step-by-step guide to versioning a Godot game project with Diversion
Whether you’re a long-time open-source game dev or an enthusiastic Godot newcomer, you probably know that getting used to a sound and robust workflow is an essential skill for any kind of software developer.
And, in particular, having a way of keeping track of your project’s progress is a really cool and often necessary thing to set up early on. Which is why, over the years, the game dev community has become more and more interested in version control for game projects.
In fact, in Godot, there are some built-in tools using one of the go-to VCS solutions, Git…
But, as we’ve discussed in several articles before, some of those “old timers” in the VCS worlds aren’t really the best fit for games, because those are complex multimedia projects. And so, as time went by, various alternative projects started to grow to offer new and more suited version control tools to game devs.
Among which: Diversion, a cloud-native VCS that is meant to enable game creators to work quickly, with nice real-time collaborative dev, and an easy-to-use interface.
So, in this tutorial, we’ll explore the basics of using Diversion to version a Godot project, from setting up an account to actually committing updated work, tracking your progress in the online web app, and even doing more advanced tasks like creating branches.
Exploring the Diversion version control tool
A quick note on Diversion’s pricing system
Like most of the cloud-based versioning tools, Diversion’s pricing works with tiers, and you can keep with the free one until you’ve reached the thresholds… which here, are actually pretty sweet!
Indeed, as shown on the pricing page, with the Indie tier account, you can have up to 5 team members completely for free - as well as 5 repositories, 100GB of storage and full support from Diversion! Meaning that you can use virtually every feature of the tool without spending a buck ;)
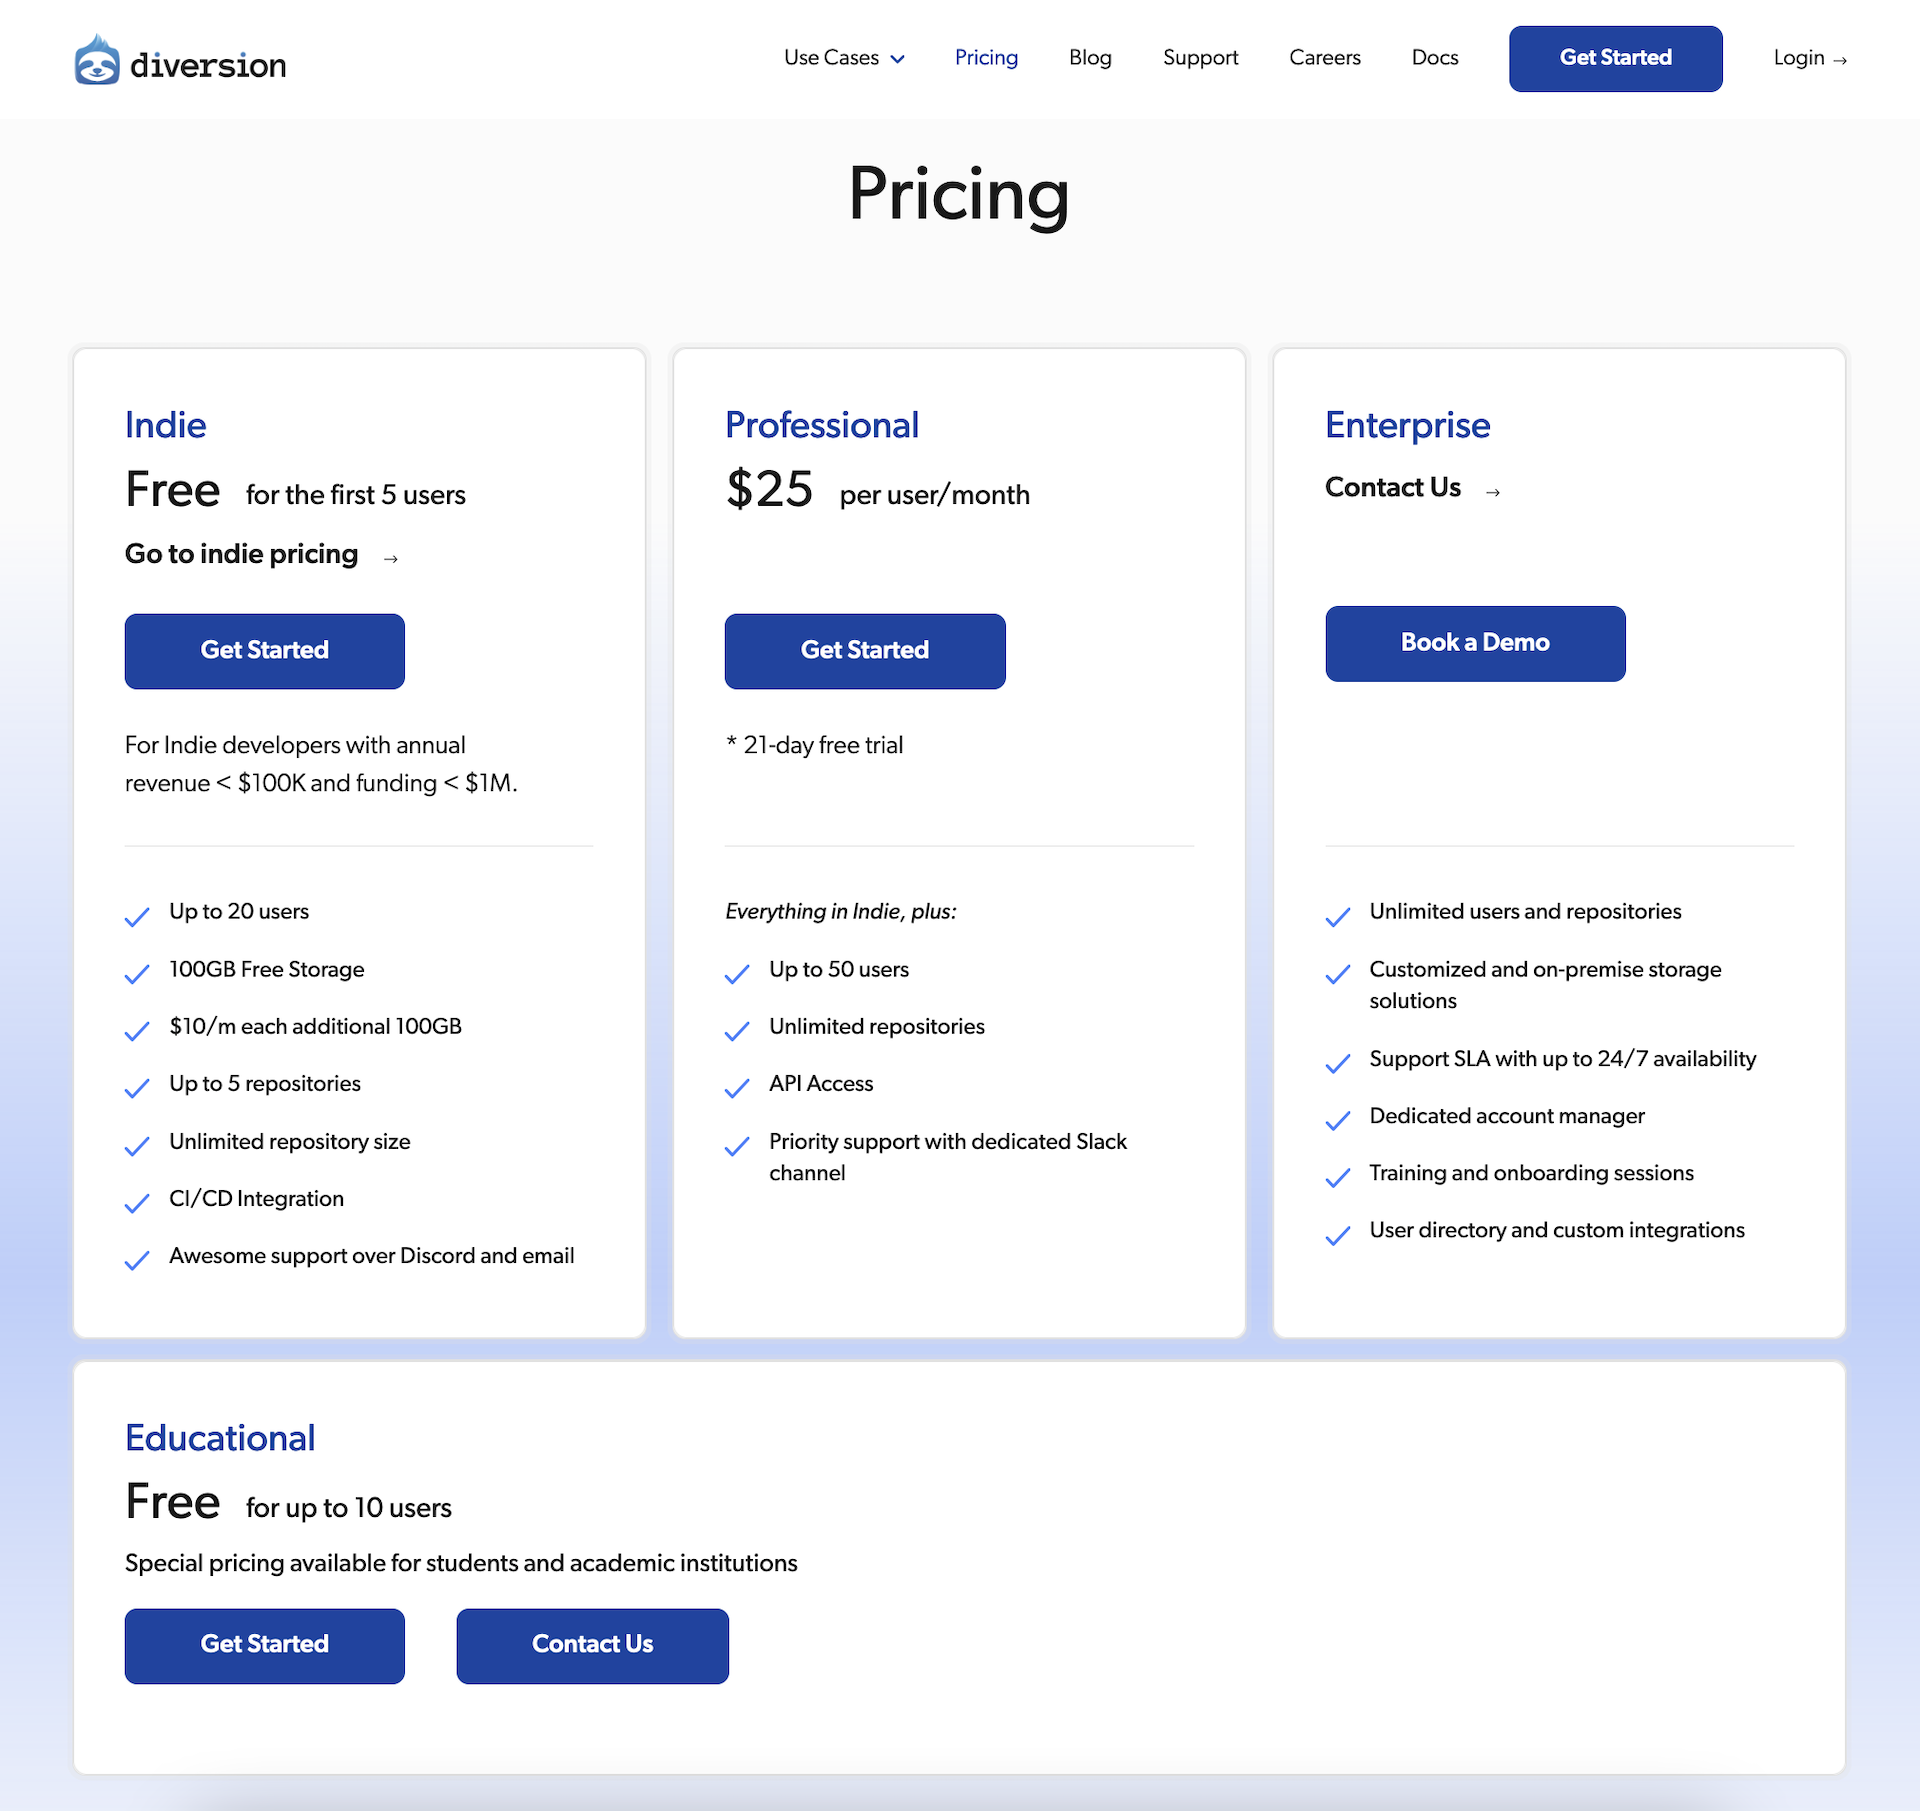
After that, if you need to scale up, you can switch to the Professional or the Enterprise tier, depending on your needs.
And also, note that there is a nice Educational tier for students and schools.
Creating your account
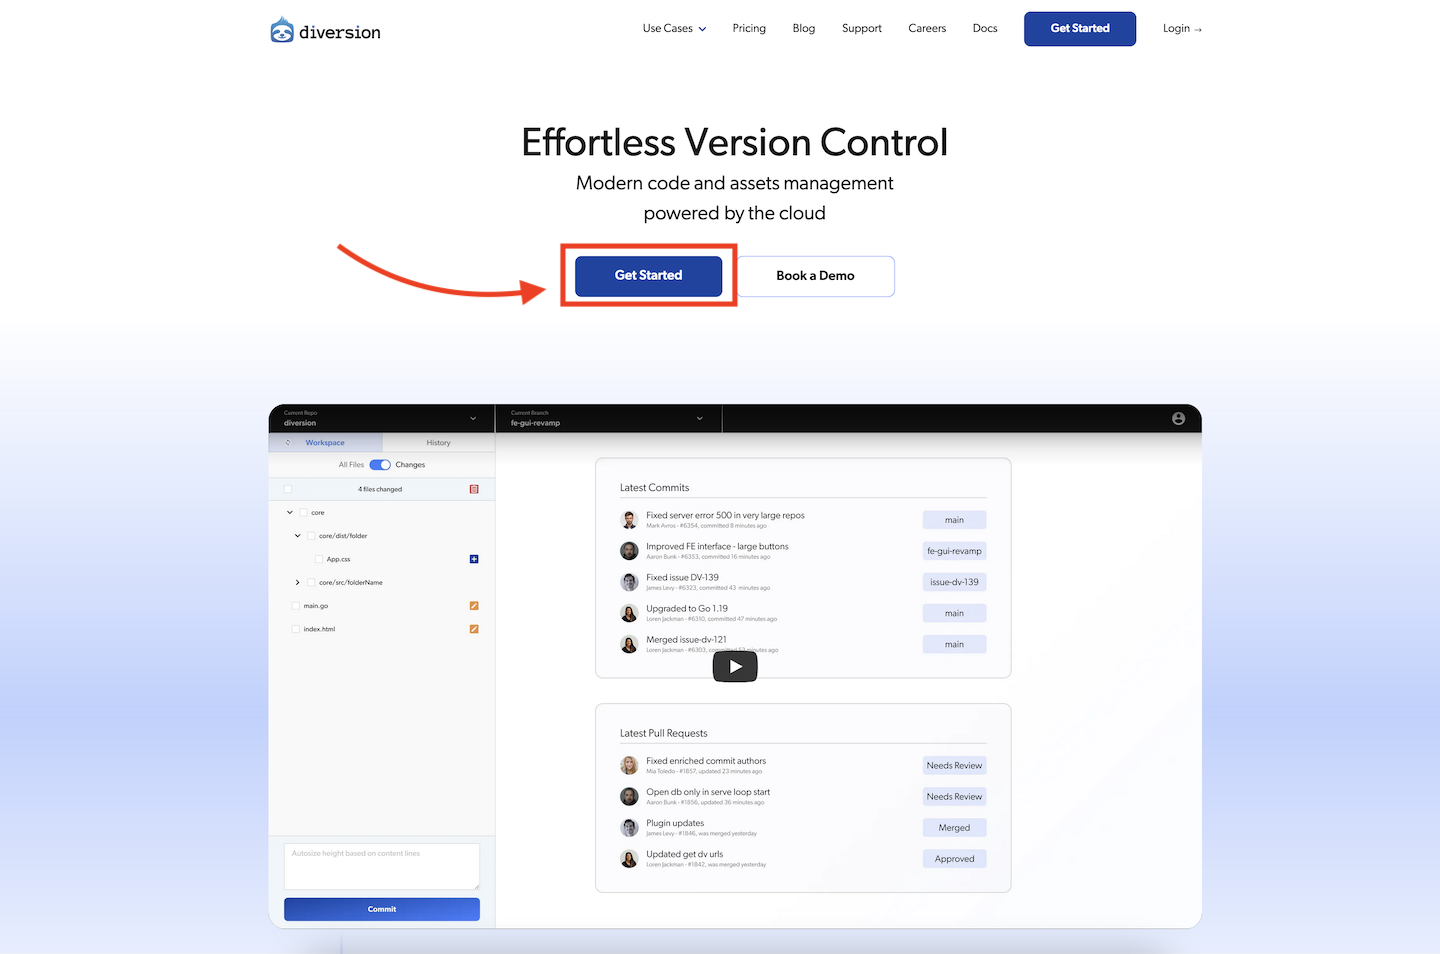
Alright so - let’s say for now you want to explore the tool, and you’re fine with the (loose) limitations of the Indie tier. Then, first things first, to get started using Diversion, you’ll need to create a new account :)
It’s actually very easy! All you need to do is go to Diversion’s website and, on the homepage, click the Get Started button:
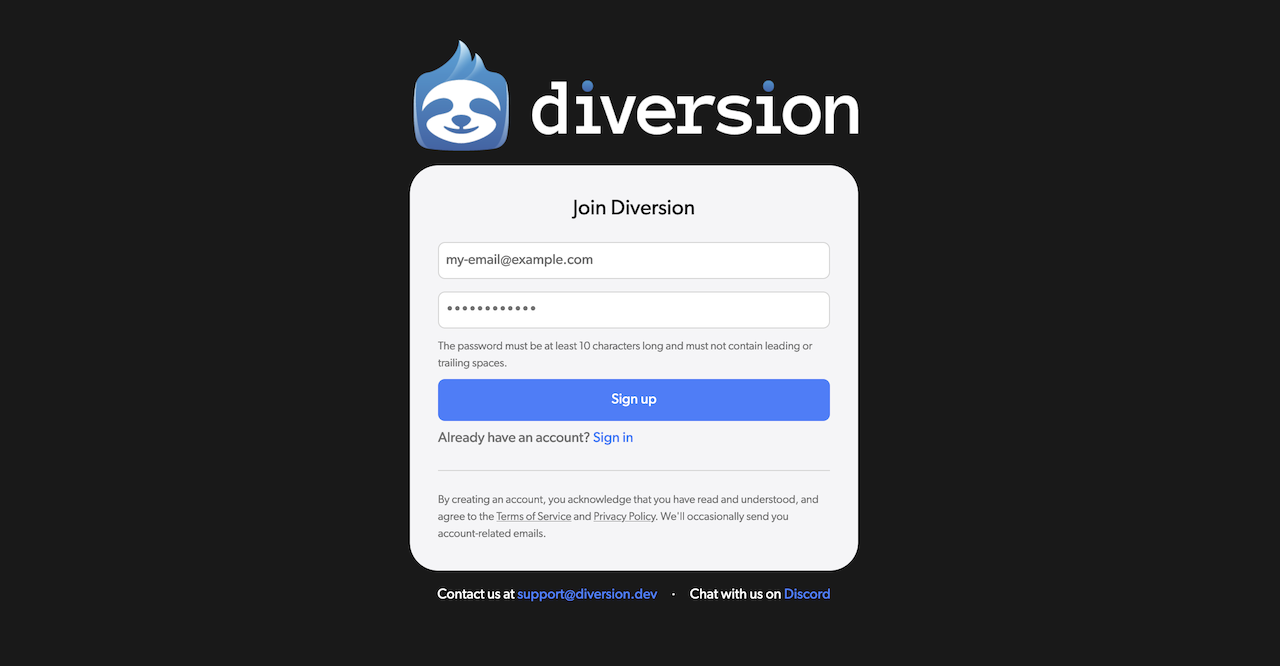
This will bring you to the signup form, where you’ll need to enter your Diversion email and password - then click the Sign up button and confirm your new account via the email you just received:
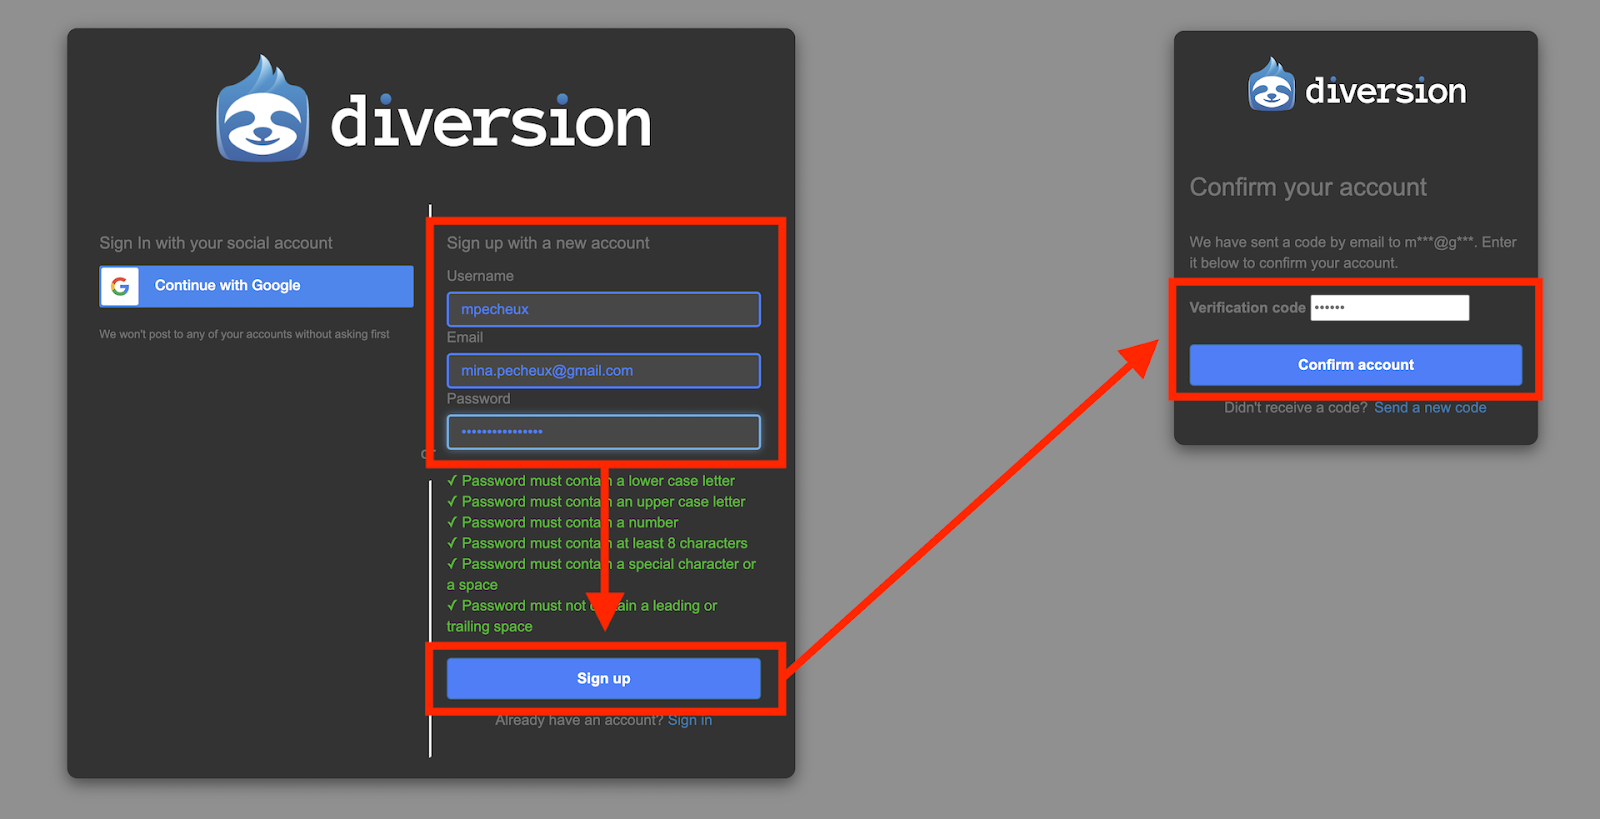
That’s where you’ll be able to enter your new Diversion account info (username, email, password) or choose to sign up using a Google account, and then you’ll simply need to confirm with the unique code sent to your email address:
And that’s it! At this point, you’ll have your Diversion account, and you’ll be auto-redirected to the welcome page with a step-by-step onboarding process. This process consists in just a few things:
- First, you’ll get some instructions on how to download and install Diversion’s desktop app, to make all your version control even easier. (Or you can also use the button in the top-right corner!)
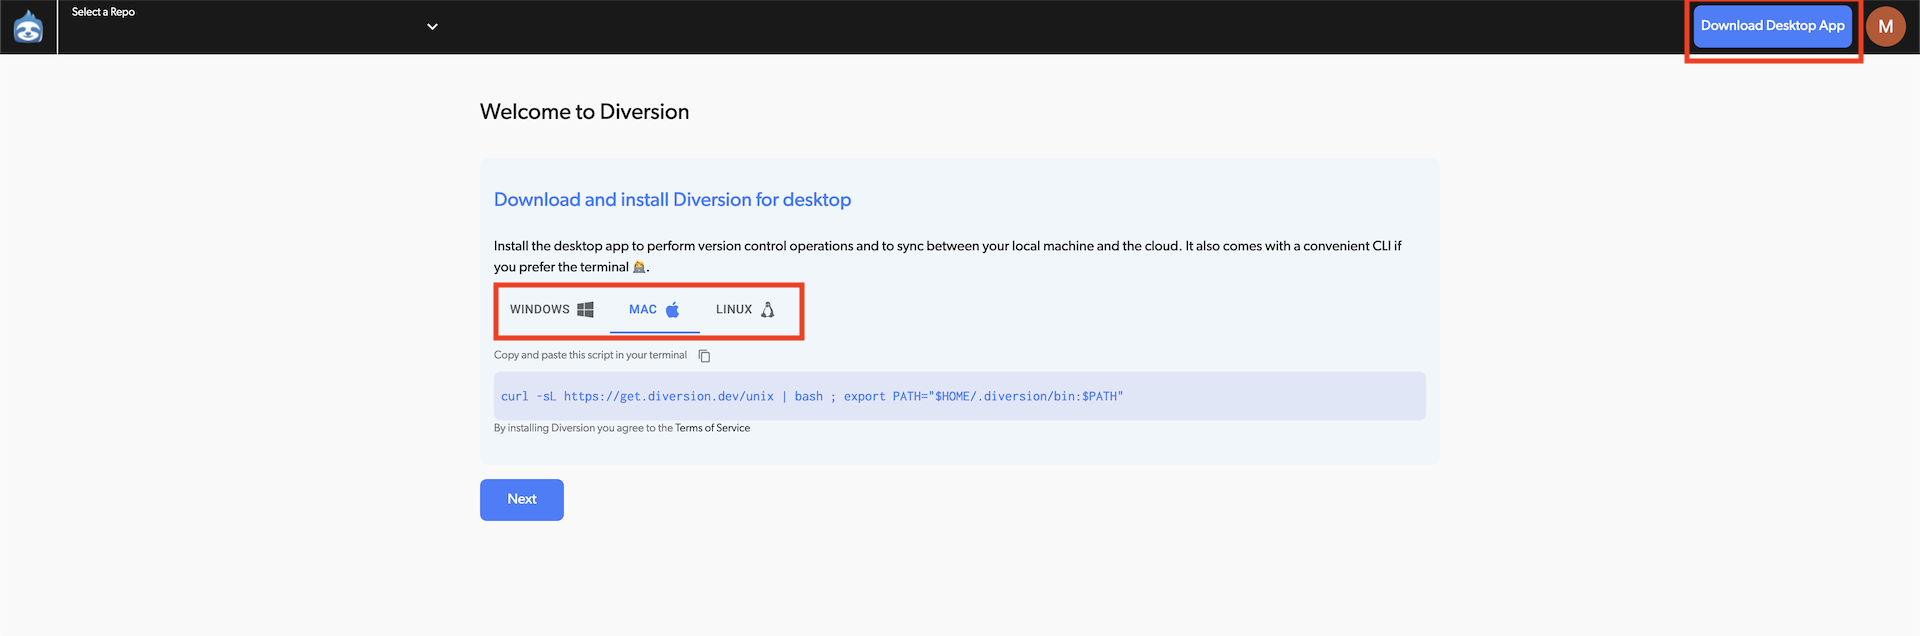
- Then, you’ll get to pick which plan you want to use for now - don’t worry, you can change this later!

- Finally, the wizard will tell you how to create or clone a repo from the remote cloud version locally on your computer.

And that’s it! You’ve got everything you need to get started :)
So, now that we have access to the tool, let’s see how to actually set it up on our computer and use it for our own projects…
Versioning a Godot game with Diversion
Preparing the Godot demo project
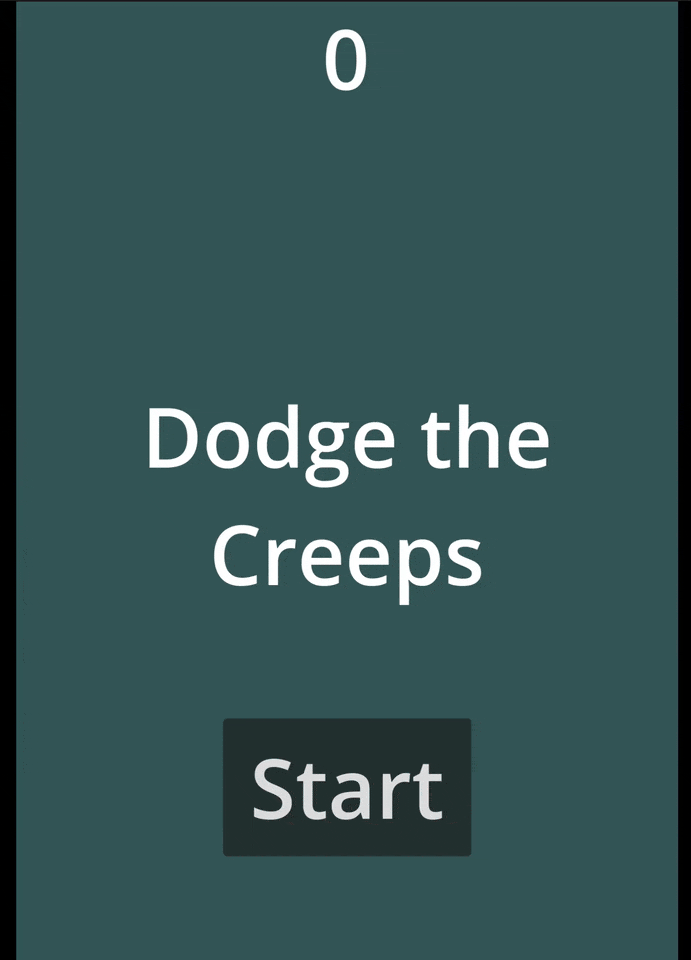
For this tutorial, I’m going to use Godot’s “Dodge the creeps” official demo project, which you can get for free on the official Github. It’s a basic 2D game where you control an avatar with the arrow keys and you have to avoid the enemies that are spawning randomly around you:
To get the project, you can download the whole repo as a zip, or clone it locally on your computer using Git; then, open your Godot app and, in the startup project browser, click the Scan option:

Then, go to your local copy of the dodge-the-creeps/ demo folder, and click Select Current Folder - this will auto-add the project to your Godot projects list, and you’ll be able to double-click on it to open it as usual:

Inside, you’ll find a simple 2D scene that looks like this - and that you can run to try out the demo game yourself :)

Initializing the Diversion repo
Now that we have a Godot project to version, let’s see how to use Diversion for it. To do that, we’re going to use the Diversion desktop app: a very cool, intuitive GUI app that allows you to setup and interact with any of Diversion projects directly on your computer!
(Don’t forget that you can download and install the Diversion desktop app from the “Getting Started” onboarding steps, available in your Diversion account space online!)
A few notes:
- The Diversion desktop app layout is actually virtually the same as the one of the Diversion web app - so what we see here will apply to both ;)
- Are you more of a CLI-kind of developer? Then be sure to check out Diversion’s docs on their command-line API - it’s really similar to Git, and it’s super easy to use :)
Ok so - let’s say you’ve installed the desktop app.
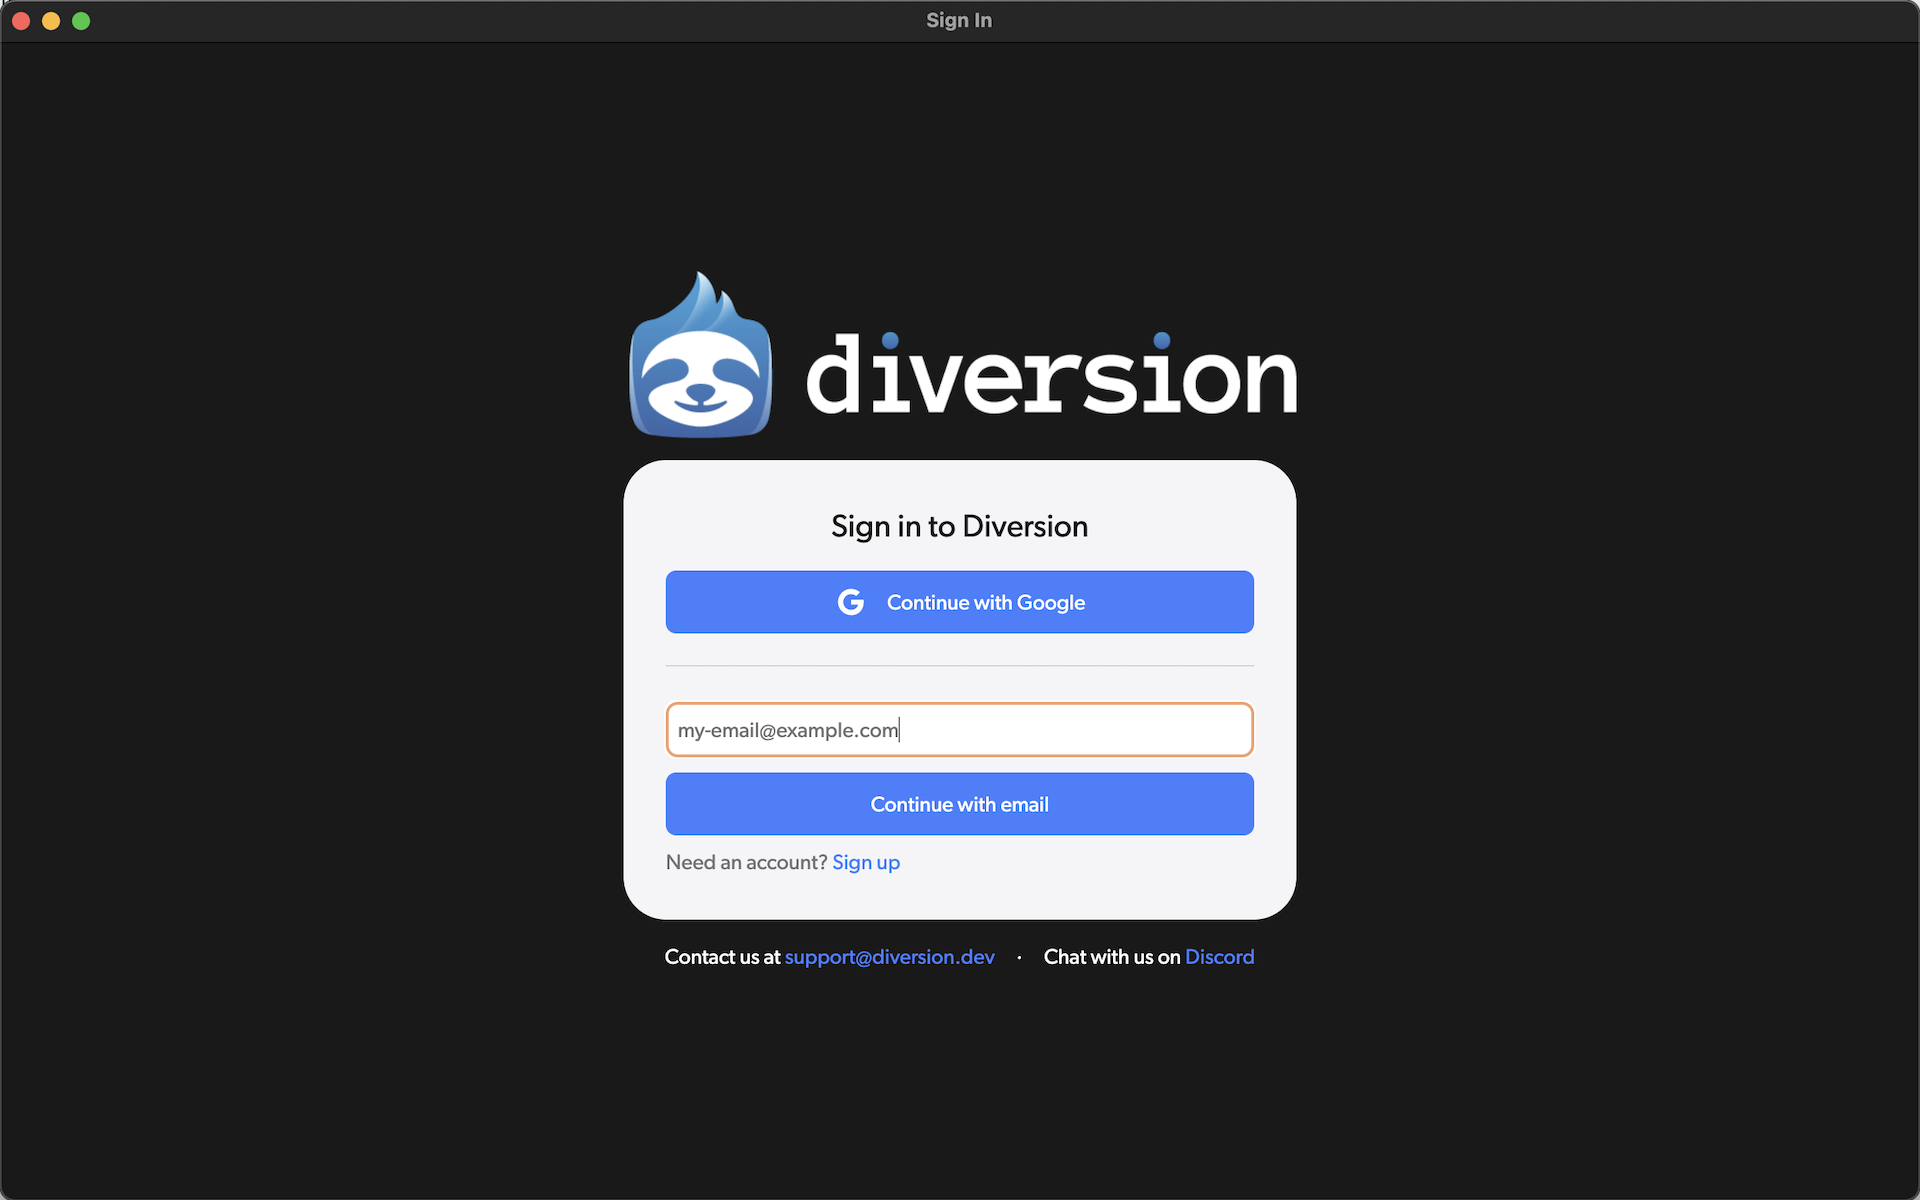
To start up, we need to log into our Diversion account so that our soon-to-be local repository gets automatically linked to the centralised cloud. So when you open up the app, you’ll get the same log in panel as before, where you can enter your Diversion account credentials:
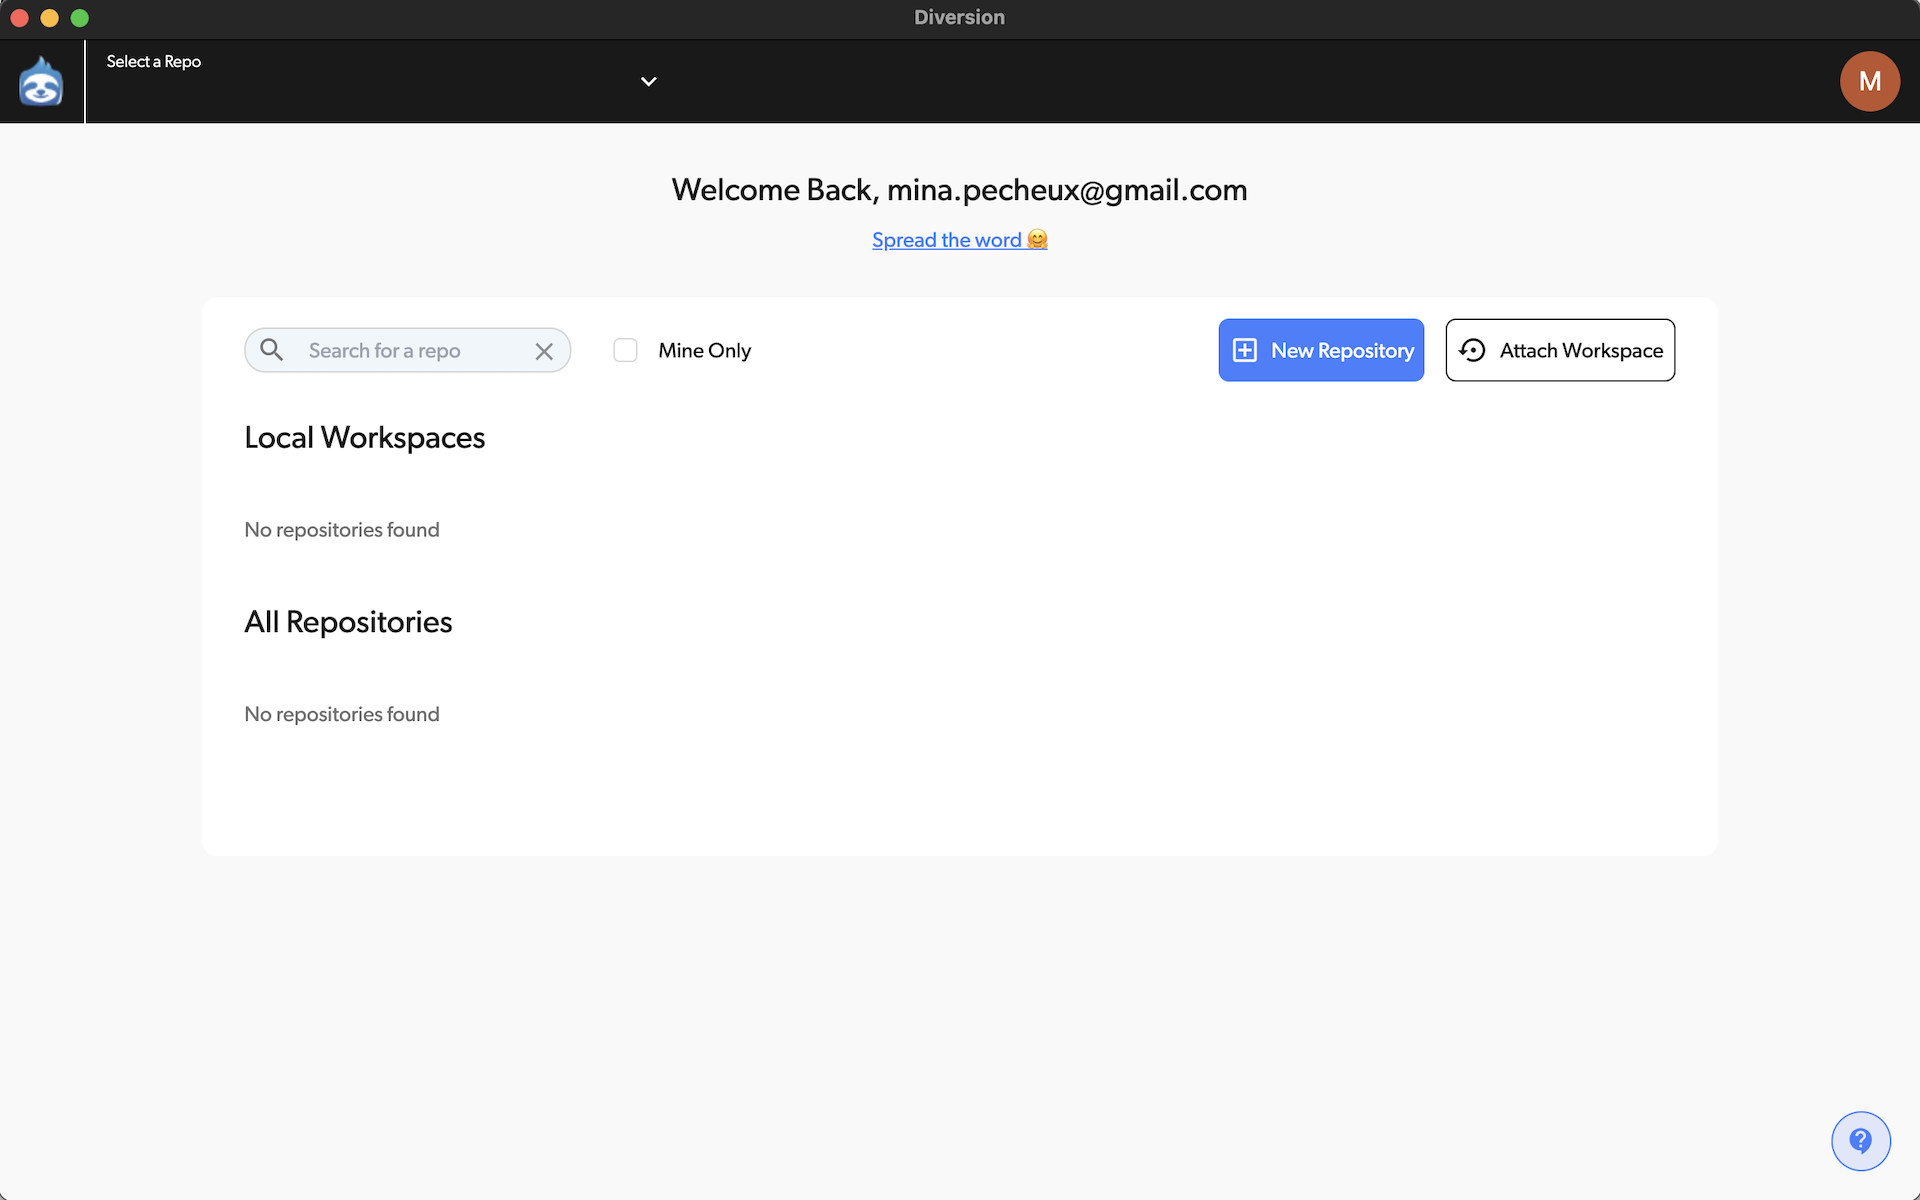
At that point, the app will show you your homepage with all of your Diversion workspaces and projects. Of course, for now, it’s empty - but this will be where you’ll be able to re-access all of your Diversion-versioned projects easily, either to sync them with the remote cloud version, or to do some local commits, or to push your modifications to the rest of the team.
Alright - let’s get started and version our Godot game using Diversion!
First, click on the New Repository button in the top-right corner of the main space:

This opens up a popup where you can pick the folder of the project to version; it can either be a brand new empty folder, if you haven’t started your project yet, or an existing folder, in which case you’ll need to navigate to it on your computer using the file tree beneath.

In our case, we’ve already got our dodge-the-creeps/ demo folder, so let’s browse our disk all the way to this location, before clicking the Create button at the bottom:

Diversion will quickly setup everything for versioning our folder, and so now we see this repo, as well as the local path it uses, in our homepage:
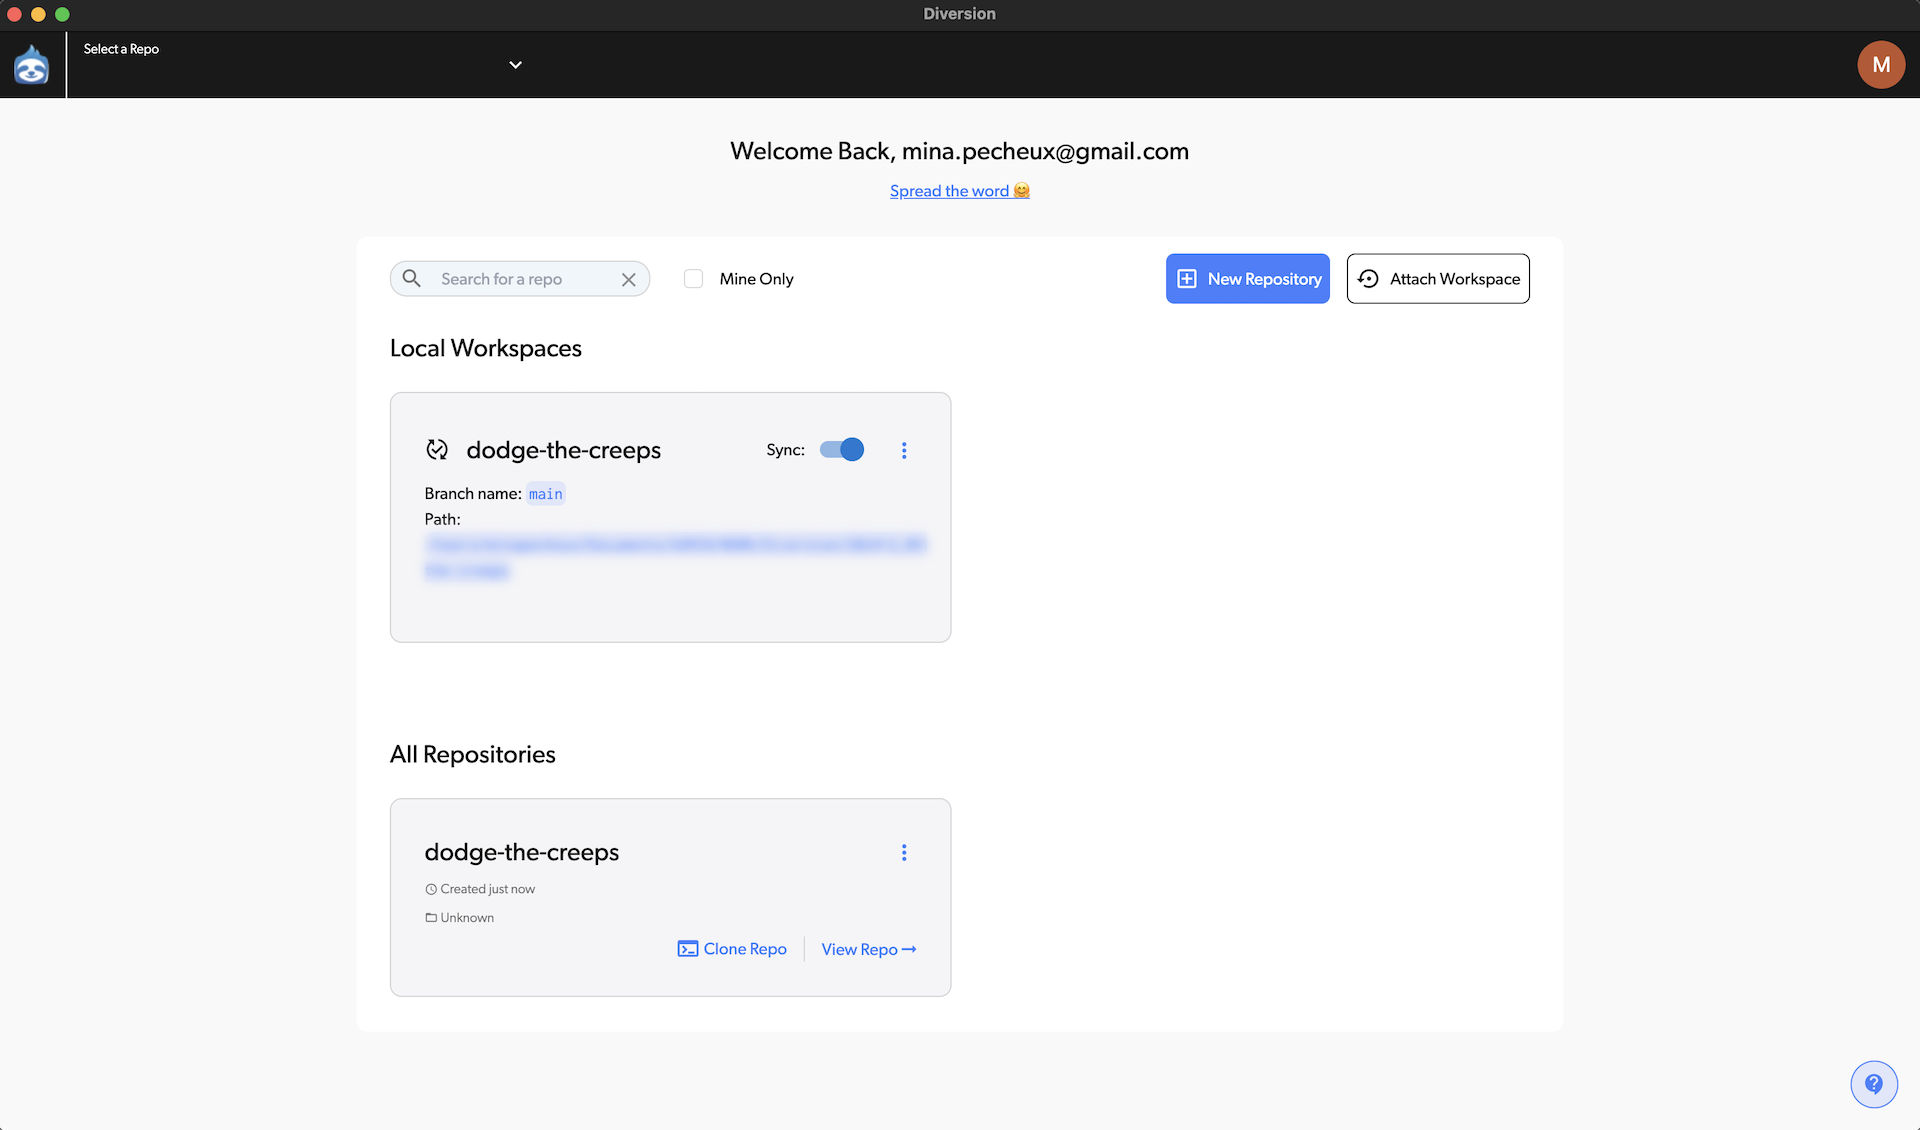
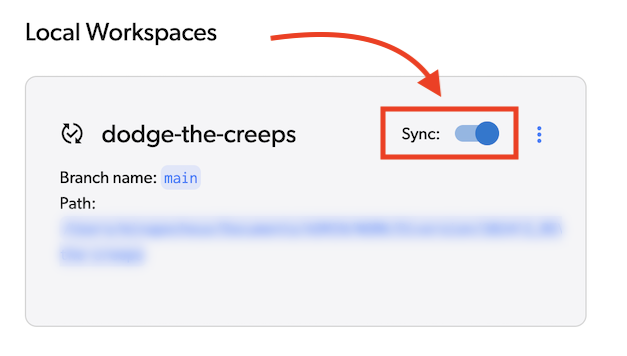
Plus, you’ll notice that, in the Local Workspaces section, the workspace associated with our repo has a Sync toggle enabled.
That’s because, as we said before, Diversion being a cloud-native tool, your repositories are always synced to the online version available via the web app by default :)
By the way, behind the scenes, creating a Diversion repo does several things:
- It creates the new repo as a .diversion subdirectory inside your project’s folder (and adds it to the list in the Diversion desktop app).
- It auto-adds a .dvignore file in the project’s folder, which is the equivalent of the .gitignore file for a Git-versioned project. This file tells Diversion which files to ignore for versioning (this can be super useful for native files that you don’t want to share, temporary data, backup files…)
- It registers this repository in your Diversion account to make it accessible from anywhere on the web app, and enables sync so that all your local changes are instantly saved online on the cloud.
Also, the base contents .dvignore file are improved regularly by the Diversion team and now contains some goodies for Godot game devs (like the .godot/ folder that is auto-generated by any Godot 4 project, and contains some cache files that don’t require versioning). So although you can always edit it to fit your own specific architecture, it should usually be fine as-is for your game projects :)
At that point, if we click on the View Repo link inside our dodge-the-creeps repo card, the app shows us the project’s workspace layout:
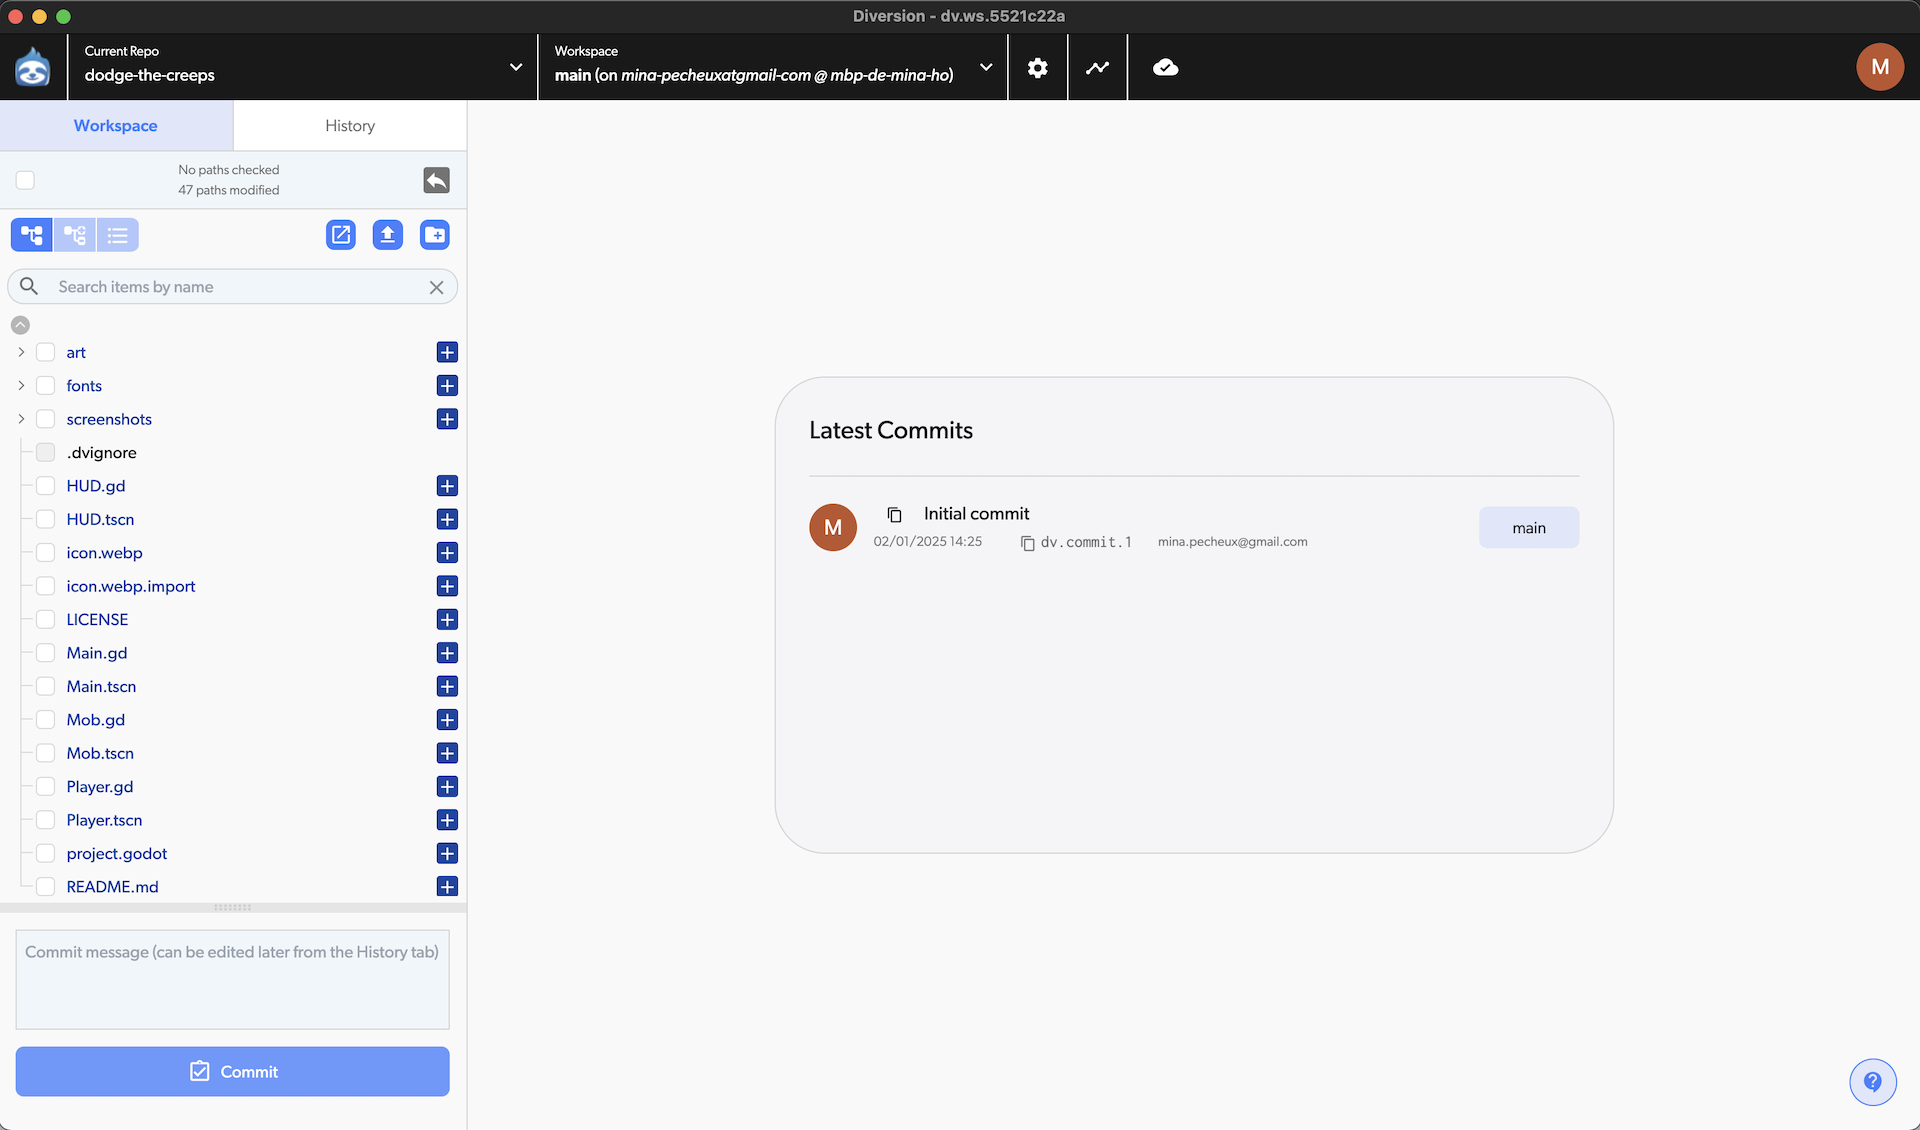
In this layout, we see every info regarding our Diversion repo for this project:
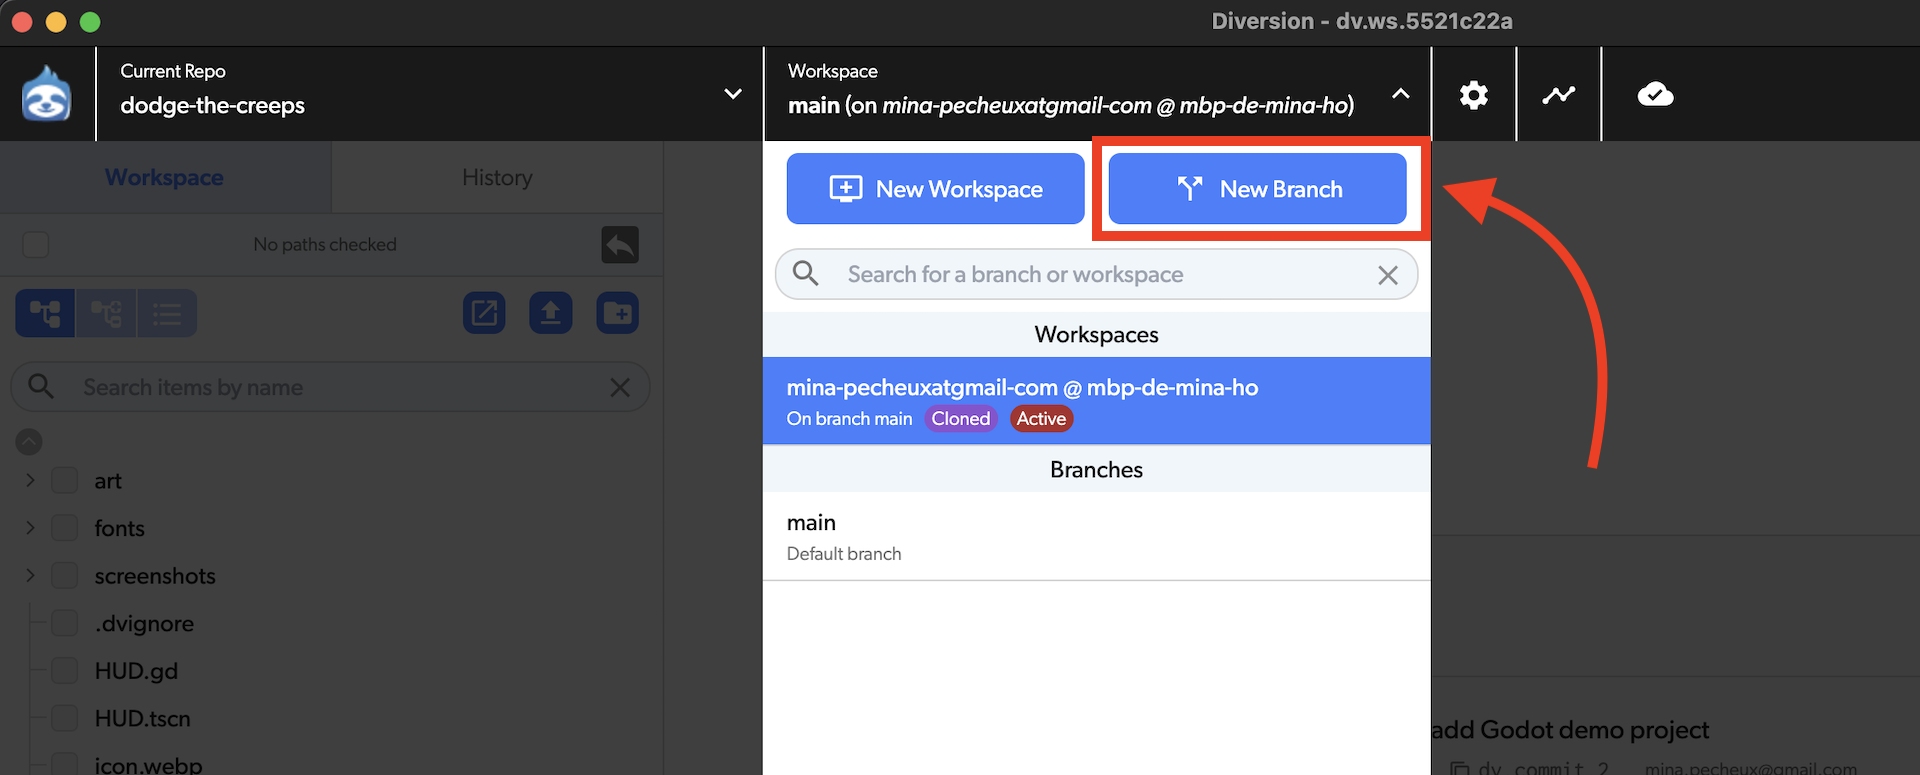
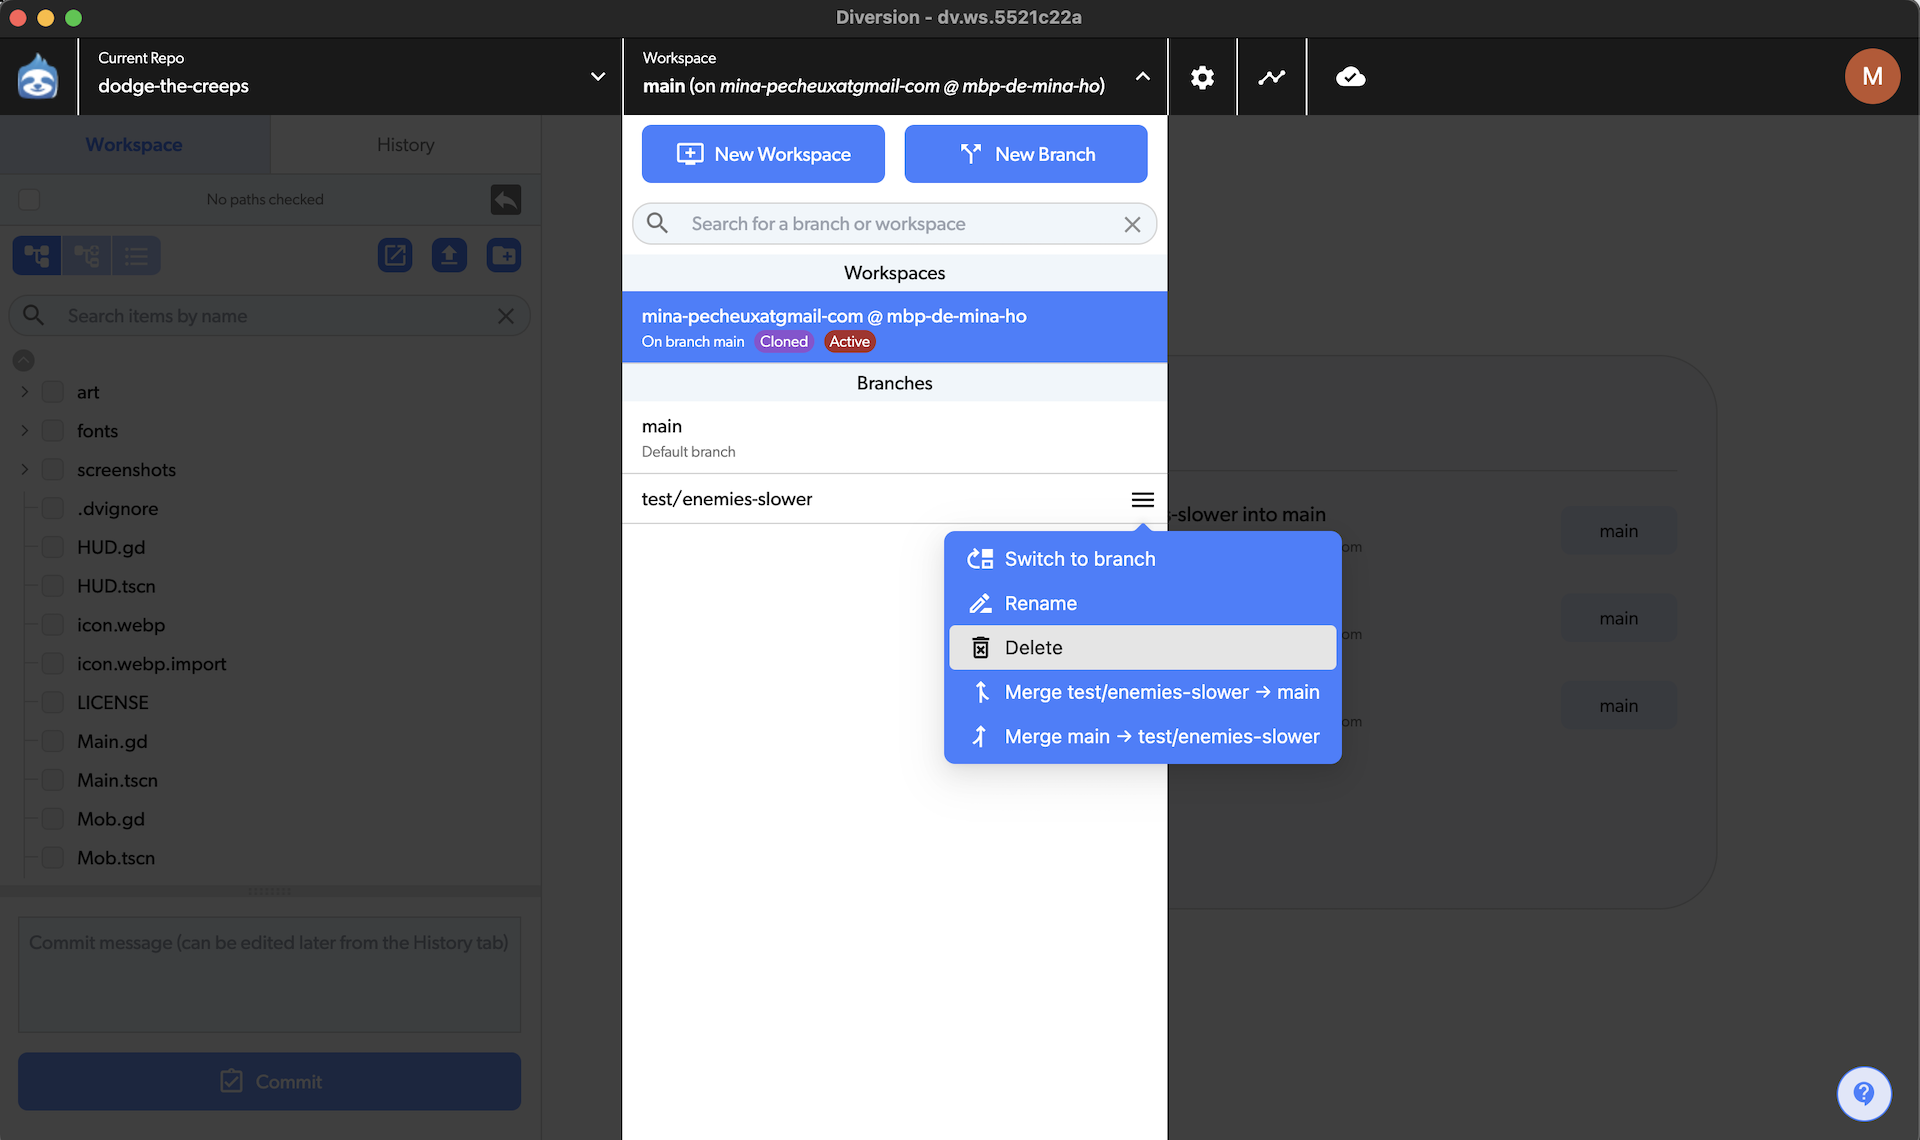
- The bar at the top contains some quick-access dropdowns to switch to another repo on the computer, or to another branch inside this repo. For example, for now, we’re in the dodge-the-creeps repo, on the default main branch.
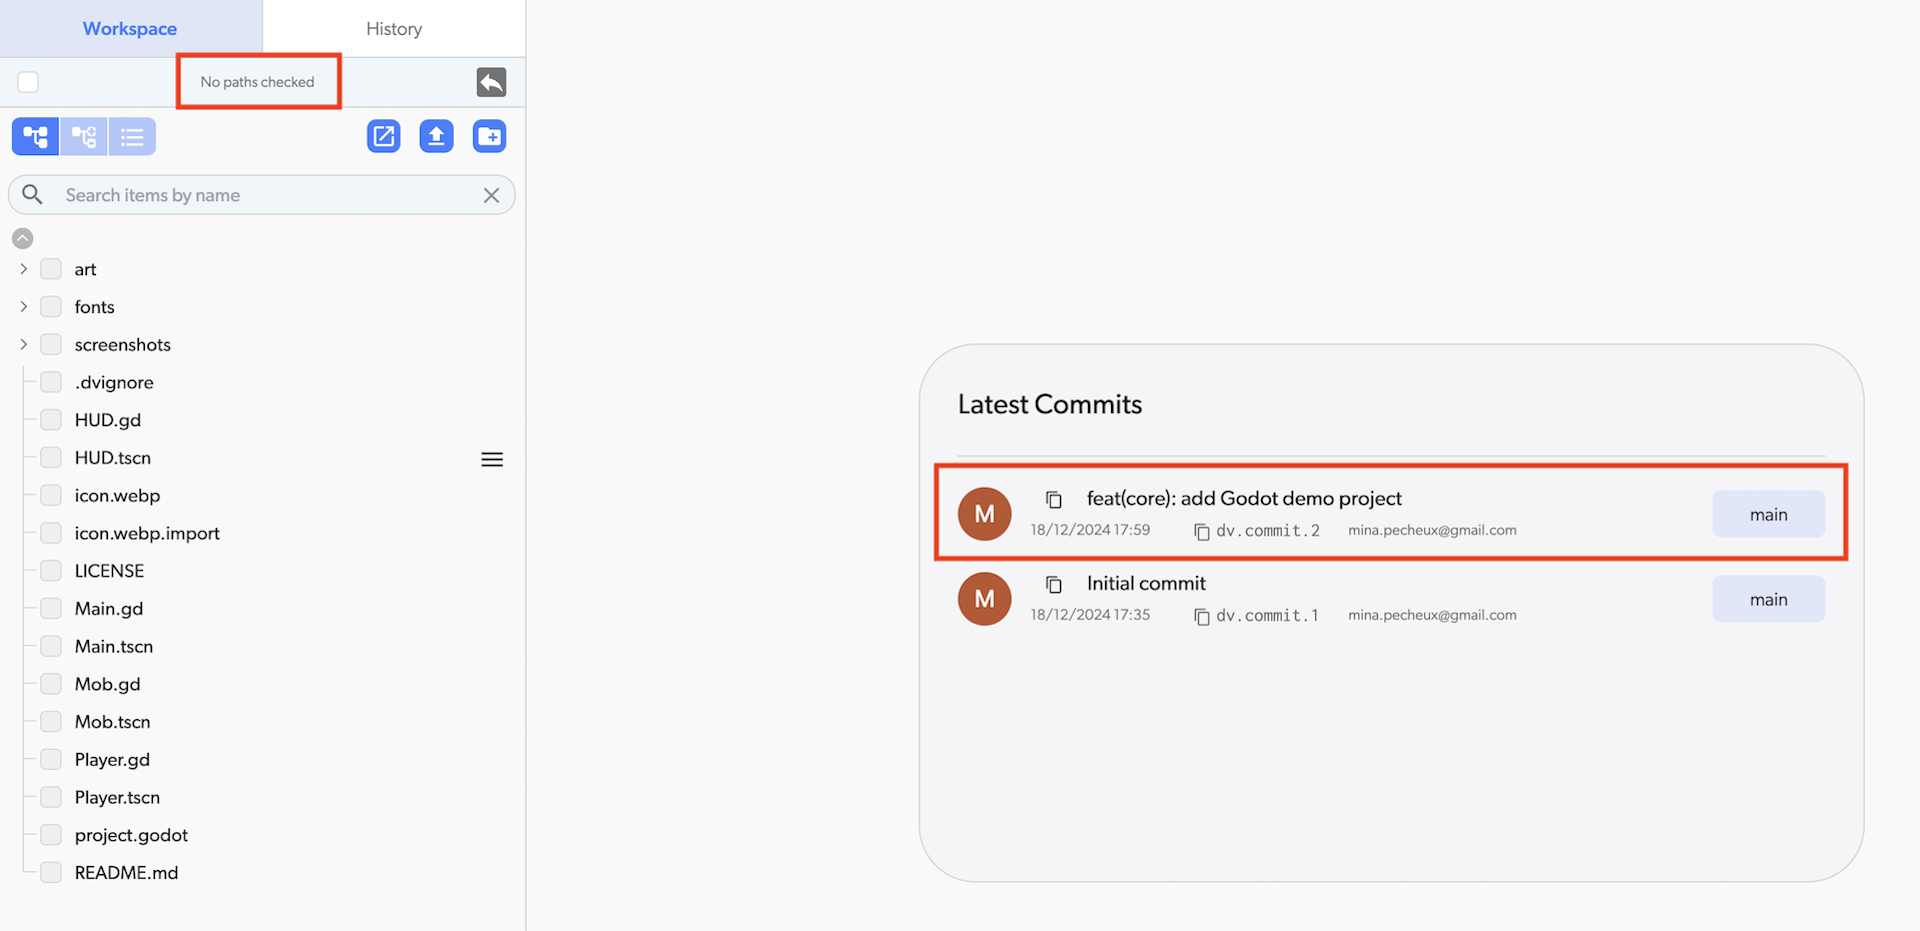
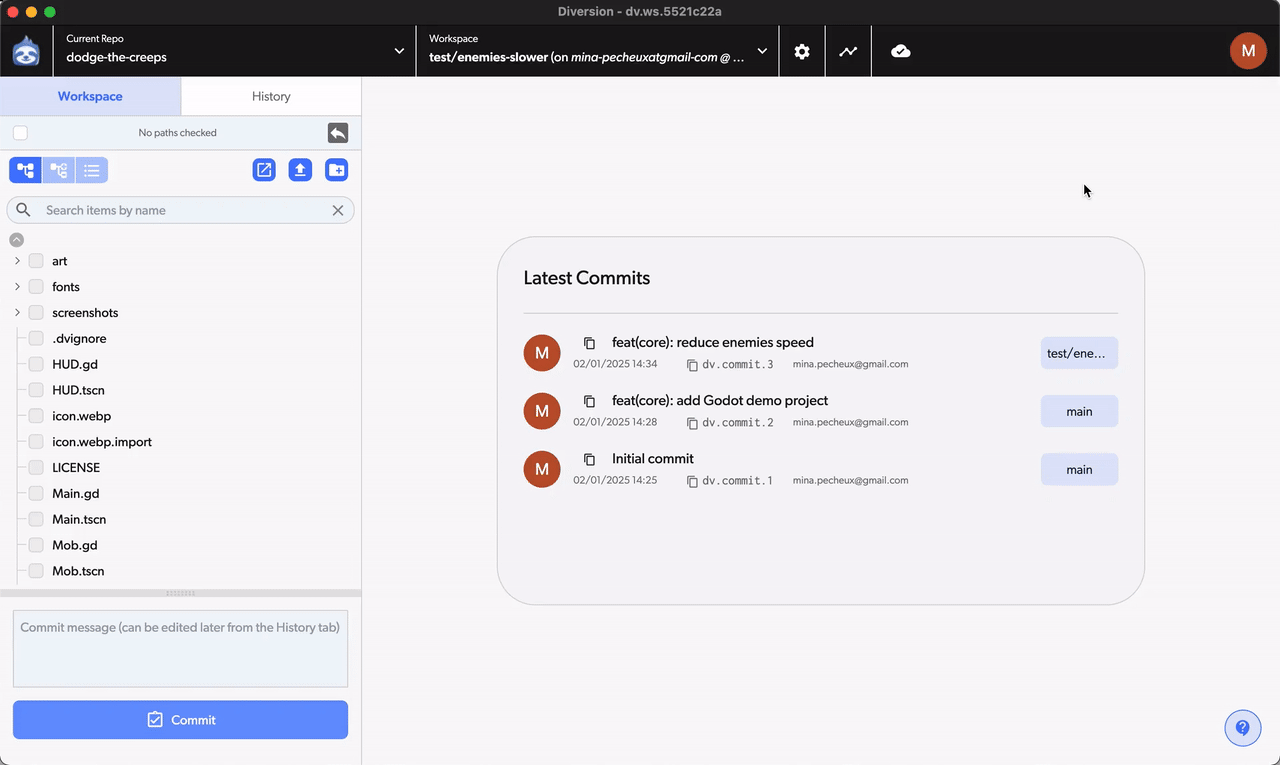
- By default, the column on the left lists all the files that can be versioned in our project’s folder hierarchy (i.e. the root directory and all of its subdirectories). At the bottom, we also have our commit button, along with its text input where we can set our commit message.
- On the right, the main part of the screen is a list of all the recent commits that happened in this repo. (And as we’ll see soon, this list considers every branch, not just the current one!)
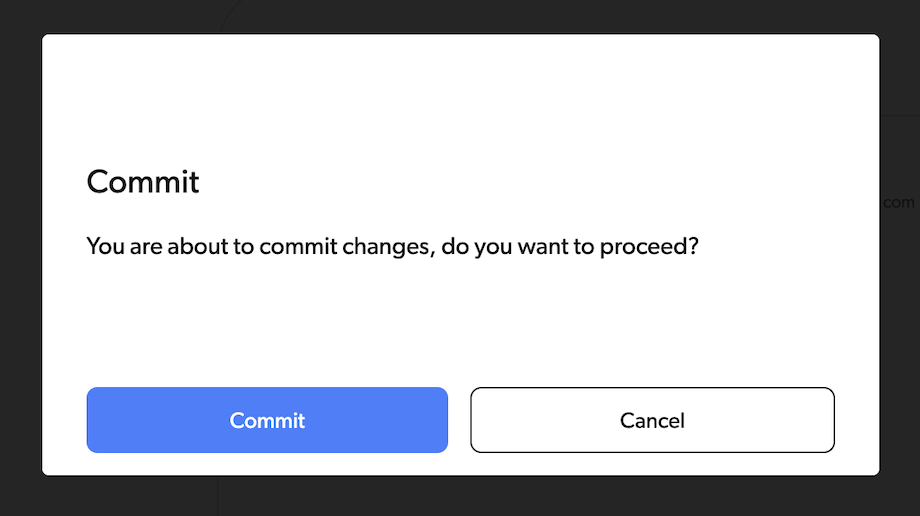
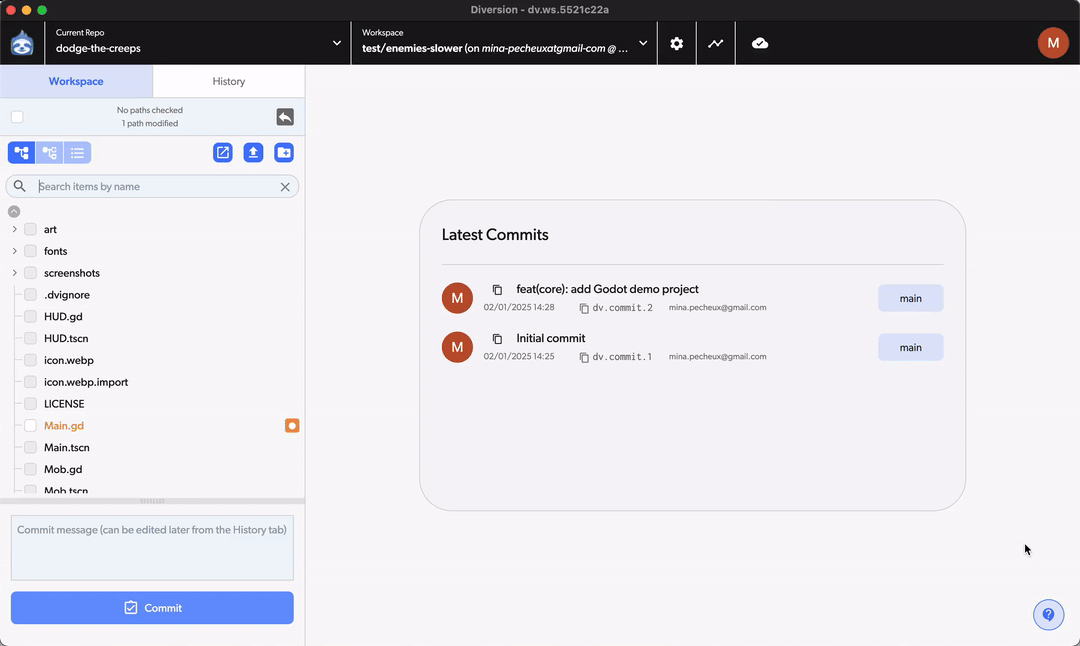
Ok - now, let’s say that we want to add all of our Godot files, and create a new commit about adding the Godot demo project. To do that, we could click on the checkbox at the very top of the workspace view to select all the files, enter our commit message in the input field at the bottom, and click the Commit button:
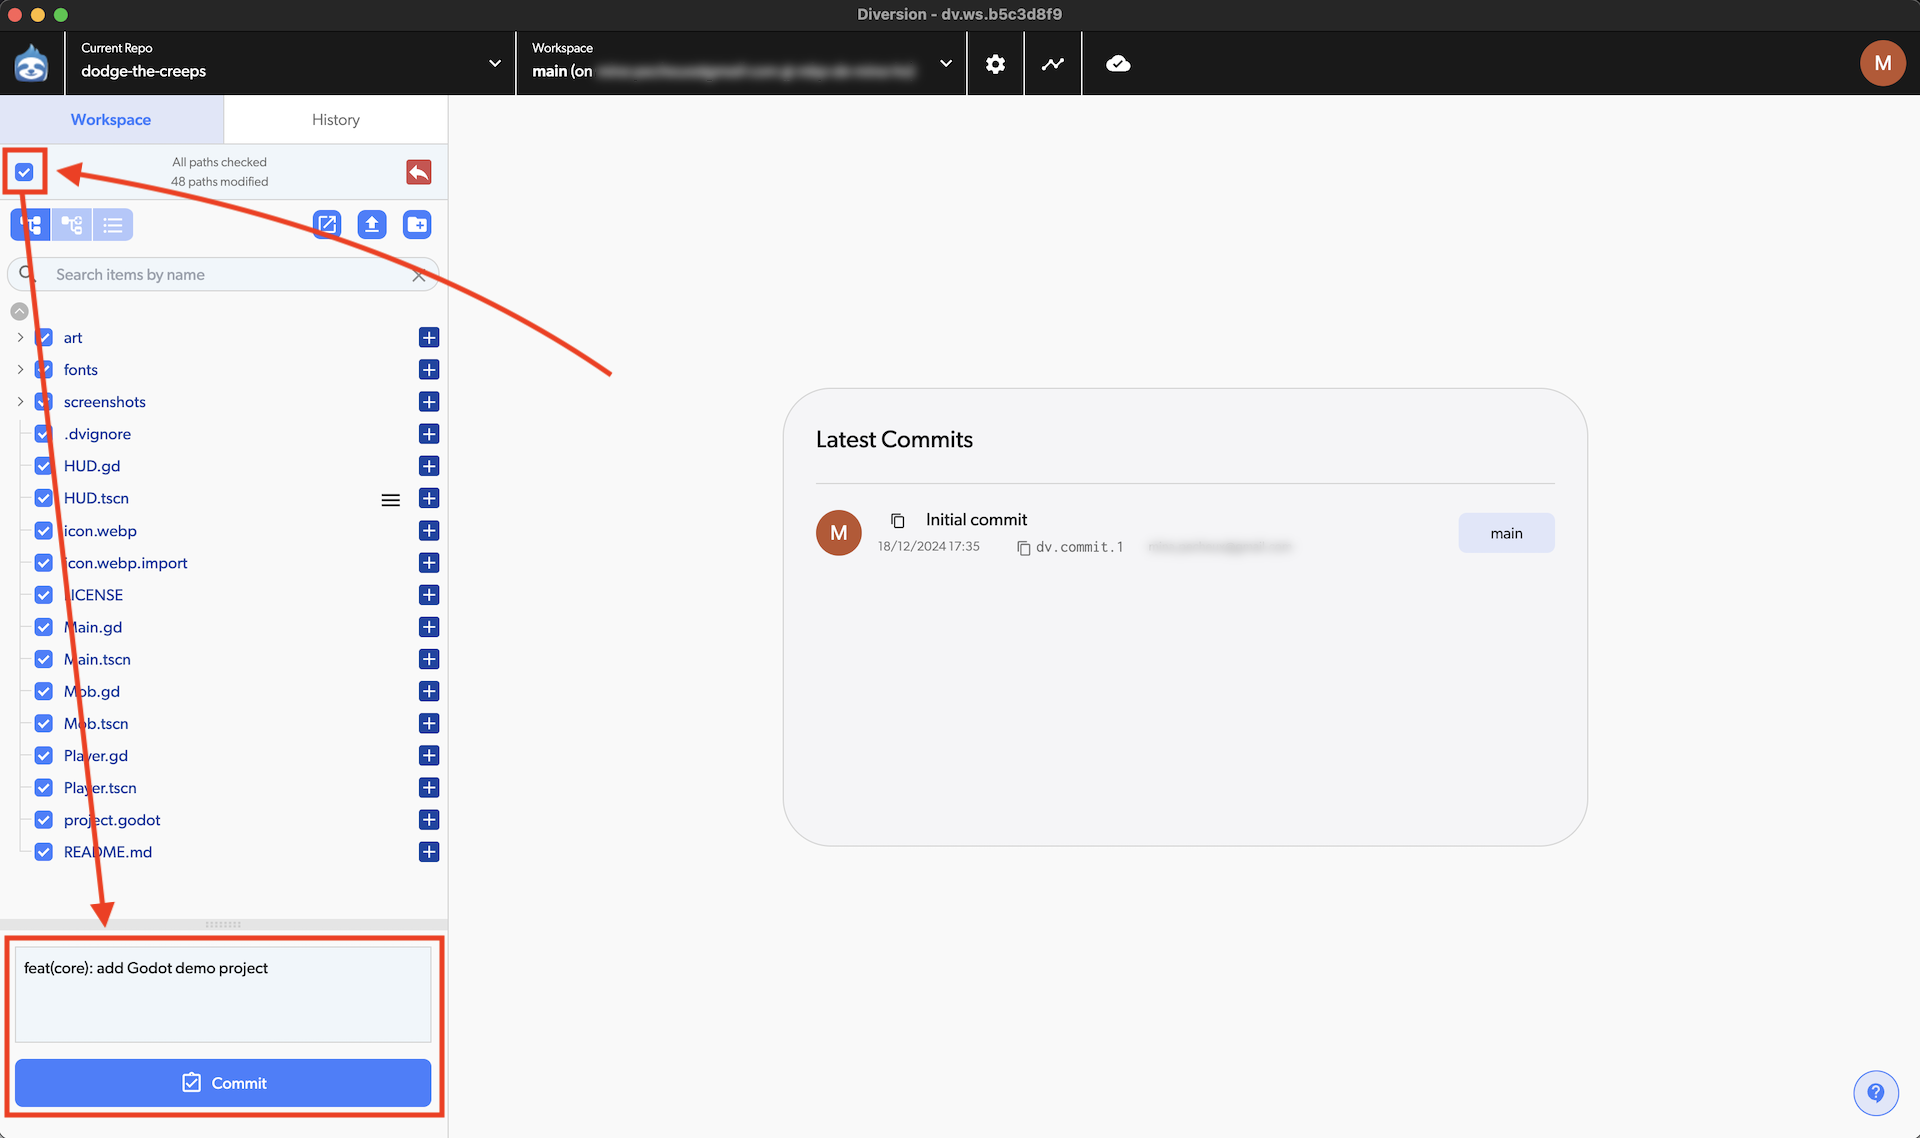
As soon as we click on the Commit button, we get a confirm window, and then a quick spinner while Diversion actually does the commit… and here we go!
Our new commit now appears in the list of recent commits on the right, and we see our workspace has no modified files anymore :)
By the way, if you have a longer history in your Diversion repo and you want to keep track of some older modifications, you can also go to the left sidebar and switch over to the History tab to see the full evolution of your project, or search for a specific commit:

Now that we know the basics, let’s see how to use branches in Diversion to help organise collaborative development, handle important features, or just follow common DevOps workflows like Trunk-based Development.
Working with branches
As most (if not all) VCS tools, Diversion has branch-related features that let us easily create, switch between and delete branches.
So in this last part, we’re going to quickly recall why using branches when versioning a project can be beneficial, and we’ll see how to apply this to our Diversion/Godot demo project.
Why should I use branches when working with a versioning tool?
Using branches in version control systems is an efficient way to manage code changes, collaborate with team members, experiment with new features, and maintain a stable and organized codebase.
Most notably, branches provide the following advantages:
- Isolating new features or big changes: Branches allow you to work on specific features or changes without affecting the main or stable codebase. This is crucial in preventing unfinished or potentially unstable code from impacting the rest of the project.
- Supporting parallel development: Multiple developers can work on different features simultaneously by creating separate branches. This parallel development can significantly speed up the overall progress of a project - and it’s totally aligned with the main objectives of Diversion, and its cloud-native nature :)
- Testing or experimenting: Branches are also a safe space for tinkering with new ideas or implementing potentially disruptive changes. Developers can create feature branches, test new code, and easily discard or merge it back into the main branch if successful.
- Collaborating & doing code reviews: Branches help with the code review process, too. After they’ve created their branch and committed changes on them, developers can initiate a pull request for team members to review before merging into the main branch. This ensures that changes meet quality standards and follow the team's coding conventions.
- Managing releases: Branches are often used to manage releases. This can help plan, verify and execute a nice release schedule while always maintaining a stable main branch.
- Doing hotfixes: If critical issues are discovered in the released version, branches can be used for quick hotfixes. This is a sort of “practical application” of the parallel development mentioned before: thanks to branches, you can address urgent problems without affecting the ongoing development work in the main branch.
So having branch-related features is a must-have for version control solutions - and Diversion has got some to make it easy to work in parallel.
Using branches in Diversion
To test the branch features, what we’re going to do is change the Godot demo a little to have enemies move more slowly; we’ll suppose this is some experimental changes that we want to test to make the game easier, but we’re not too sure it will be perfect - so we’d rather use a branch to isolate our new development.
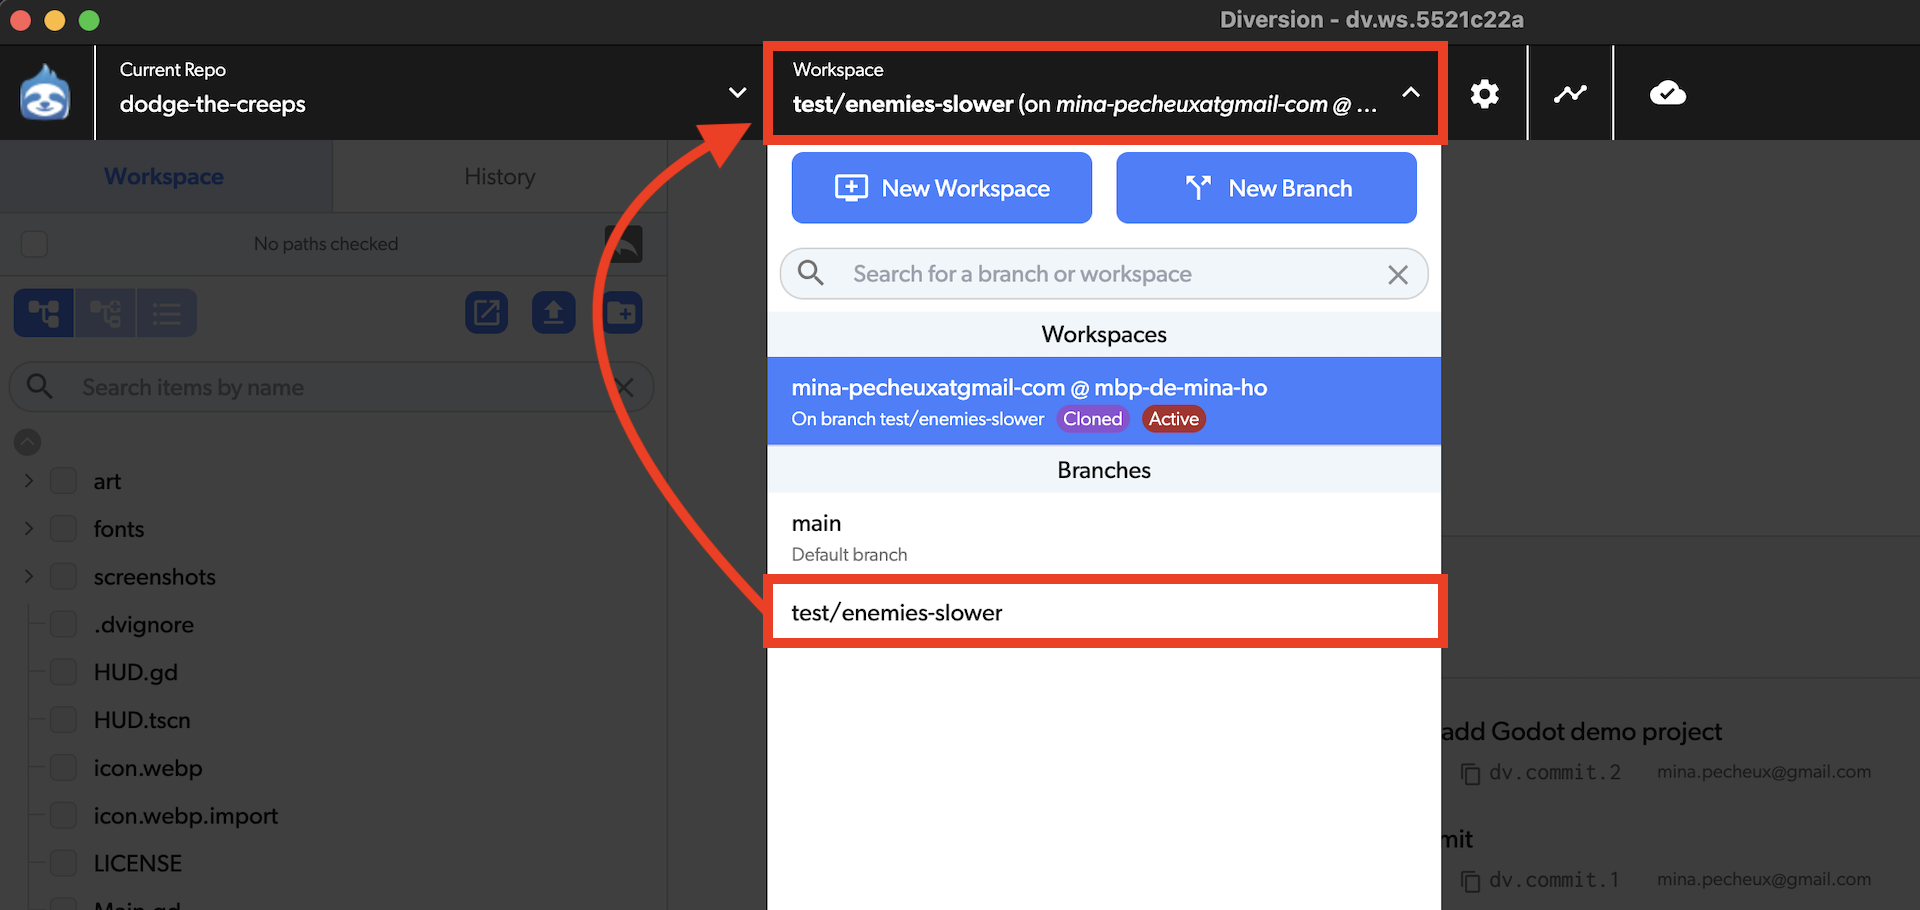
To create our new branch, we can go to the branch dropdown at the top of our workspace layout and click on the New Branch button:
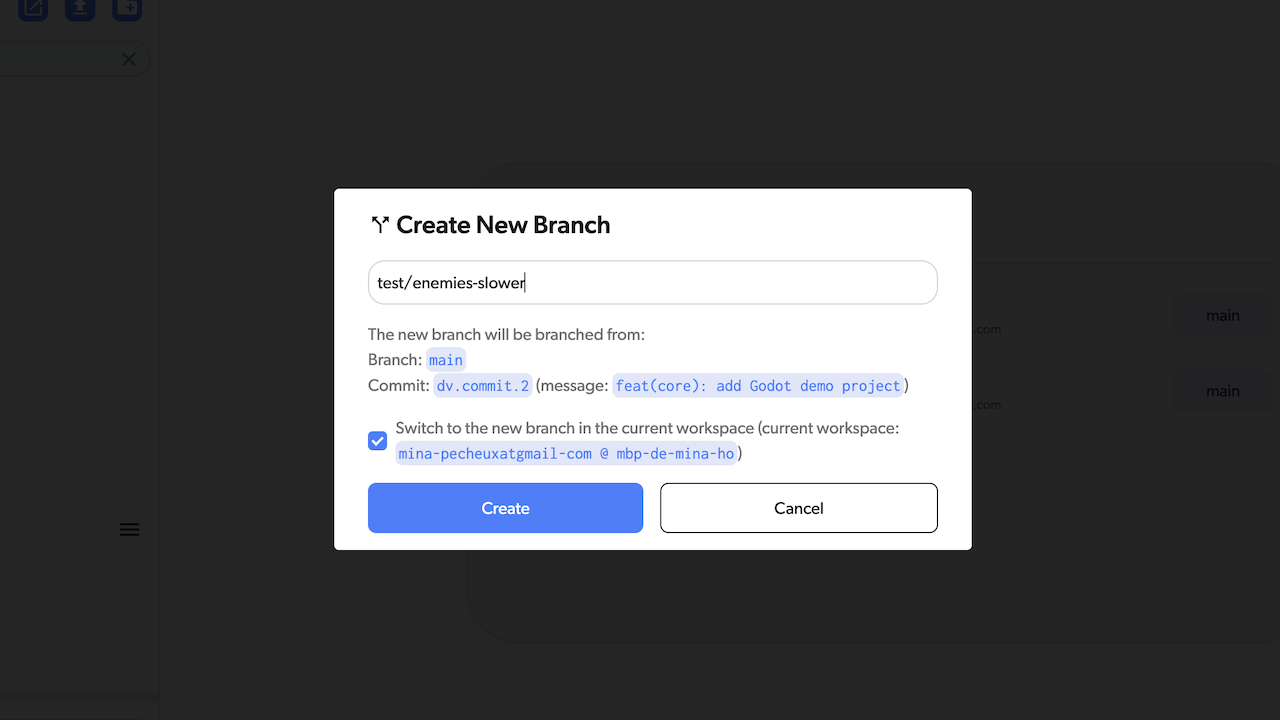
This will open up a popup where we can specify the name of our new branch, and Diversion also tells us which commit this new branch will stem from. Here, we can name our branch something like test/enemies-slower:
As soon as we create our branch, you’ll notice that Diversion auto-switched us to it (contrary to Git, for example, that doesn’t auto-check you out on your new branch):
So we’re now on our new branch, ready to work. The next step is to actually do our change in the code, to reduce the enemies’ speed.
To do this, let’s go to the Main.gd script, in the _on_MobTimer_timeout() function, and replace:
# Choose the velocity for the mob.
var velocity = Vector2(randf_range(150.0, 250.0), 0.0)
With:
# Choose the velocity for the mob.
var velocity = Vector2(randf_range(50.0, 150.0), 0.0)
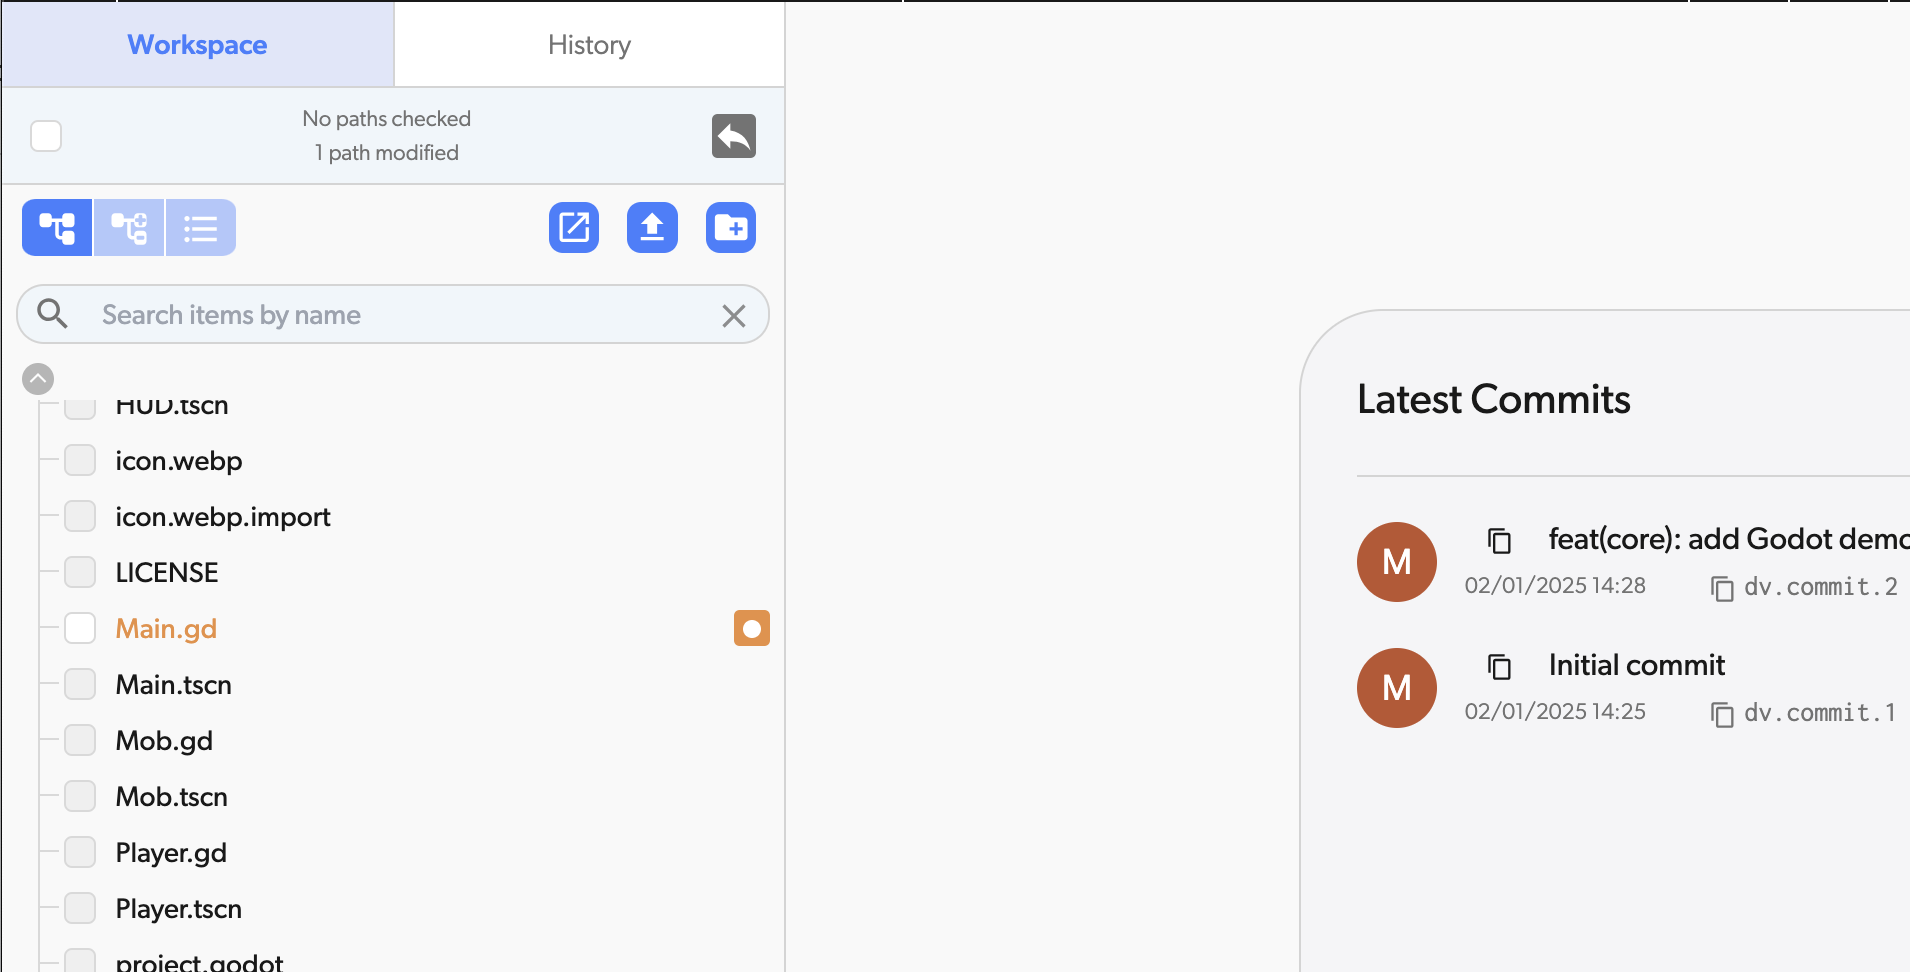
If you run the game again, you’ll notice that the enemies now move more slowly, making it slightly easier to dodge them and last longer. The modified file is also visible if we come back to the Diversion desktop app and look at the files in the left sidebar:
Moreover, if you want to go further and actually inspect the changes, you can always click on the modified file in the Workspace tab, and select the split view at the top to compare the modified version to the previous one:
Alright! Now, let’s commit our changes in our current test/enemies-slower branch, so that everyone in the team can use this branch to try out our changes and give some feedback.

Once that’s done, you can compare our two branches by selecting them in the dropdown at the top, and then selecting the commits to compare:
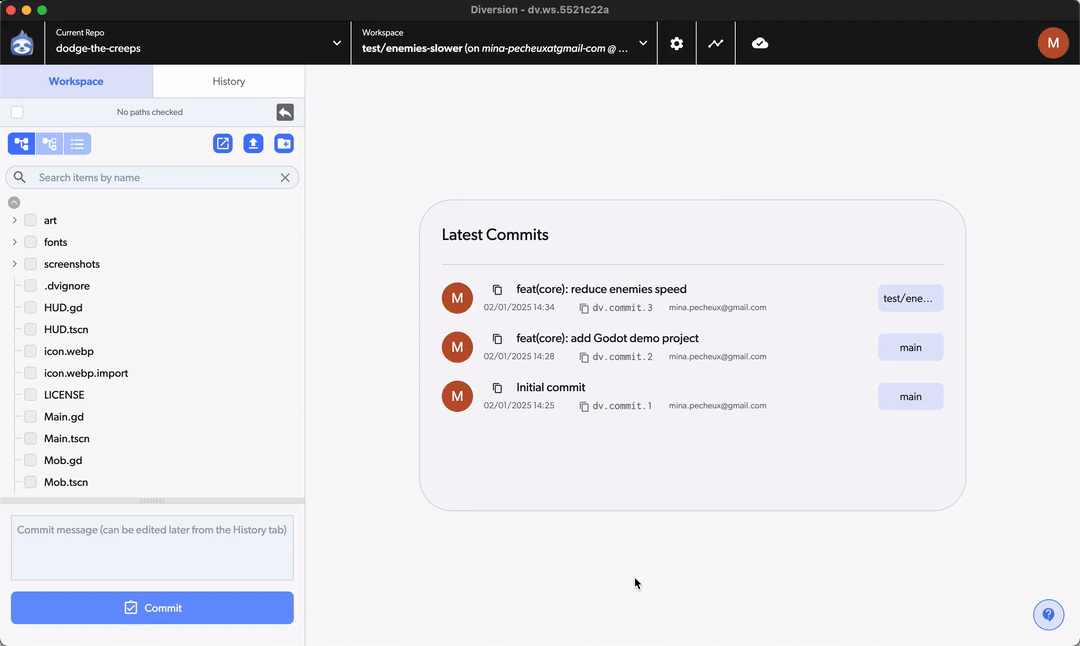
Finally, suppose the team decides to keep this change and wants to integrate it in the production version of the game. Then, to re-merge this new commit in the main branch, we just need to open our branch dropdown again, click on the little options icon on the right of the main branch item, and click on Merge test/enemies-slower → main.
After that, if we switch back to our main branch, we see that we got our new merge commit and that our changes have been re-integrated in the main production/release list of commits.
But it’s important to remember that merging a branch doesn’t automatically destroy it (because you might want to keep working on it afterwards, depending on the situation). So to really clean up our work session here, we should also remove our test branch.
We can do this easily, still in the branch dropdown, by clicking on the options icon on the right of the test/enemies-slower branch item and selecting Delete:
And here we are! We’ve done our very first branch merge using Diversion, and our demo repo is all neat and clean :)
Conclusion
So there you go: you now know how to initialize, configure and update a Diversion repository for a Godot project. And you even know how to work with branches to get a more organized workflow and support your collaborative dev!
Of course, this was just a quick intro to using Diversion for version control, and more specifically for a Godot project. But of course, if you’re curious, you should definitely have a go by going to the official website, or joining their Discord to ask all your questions directly :)


